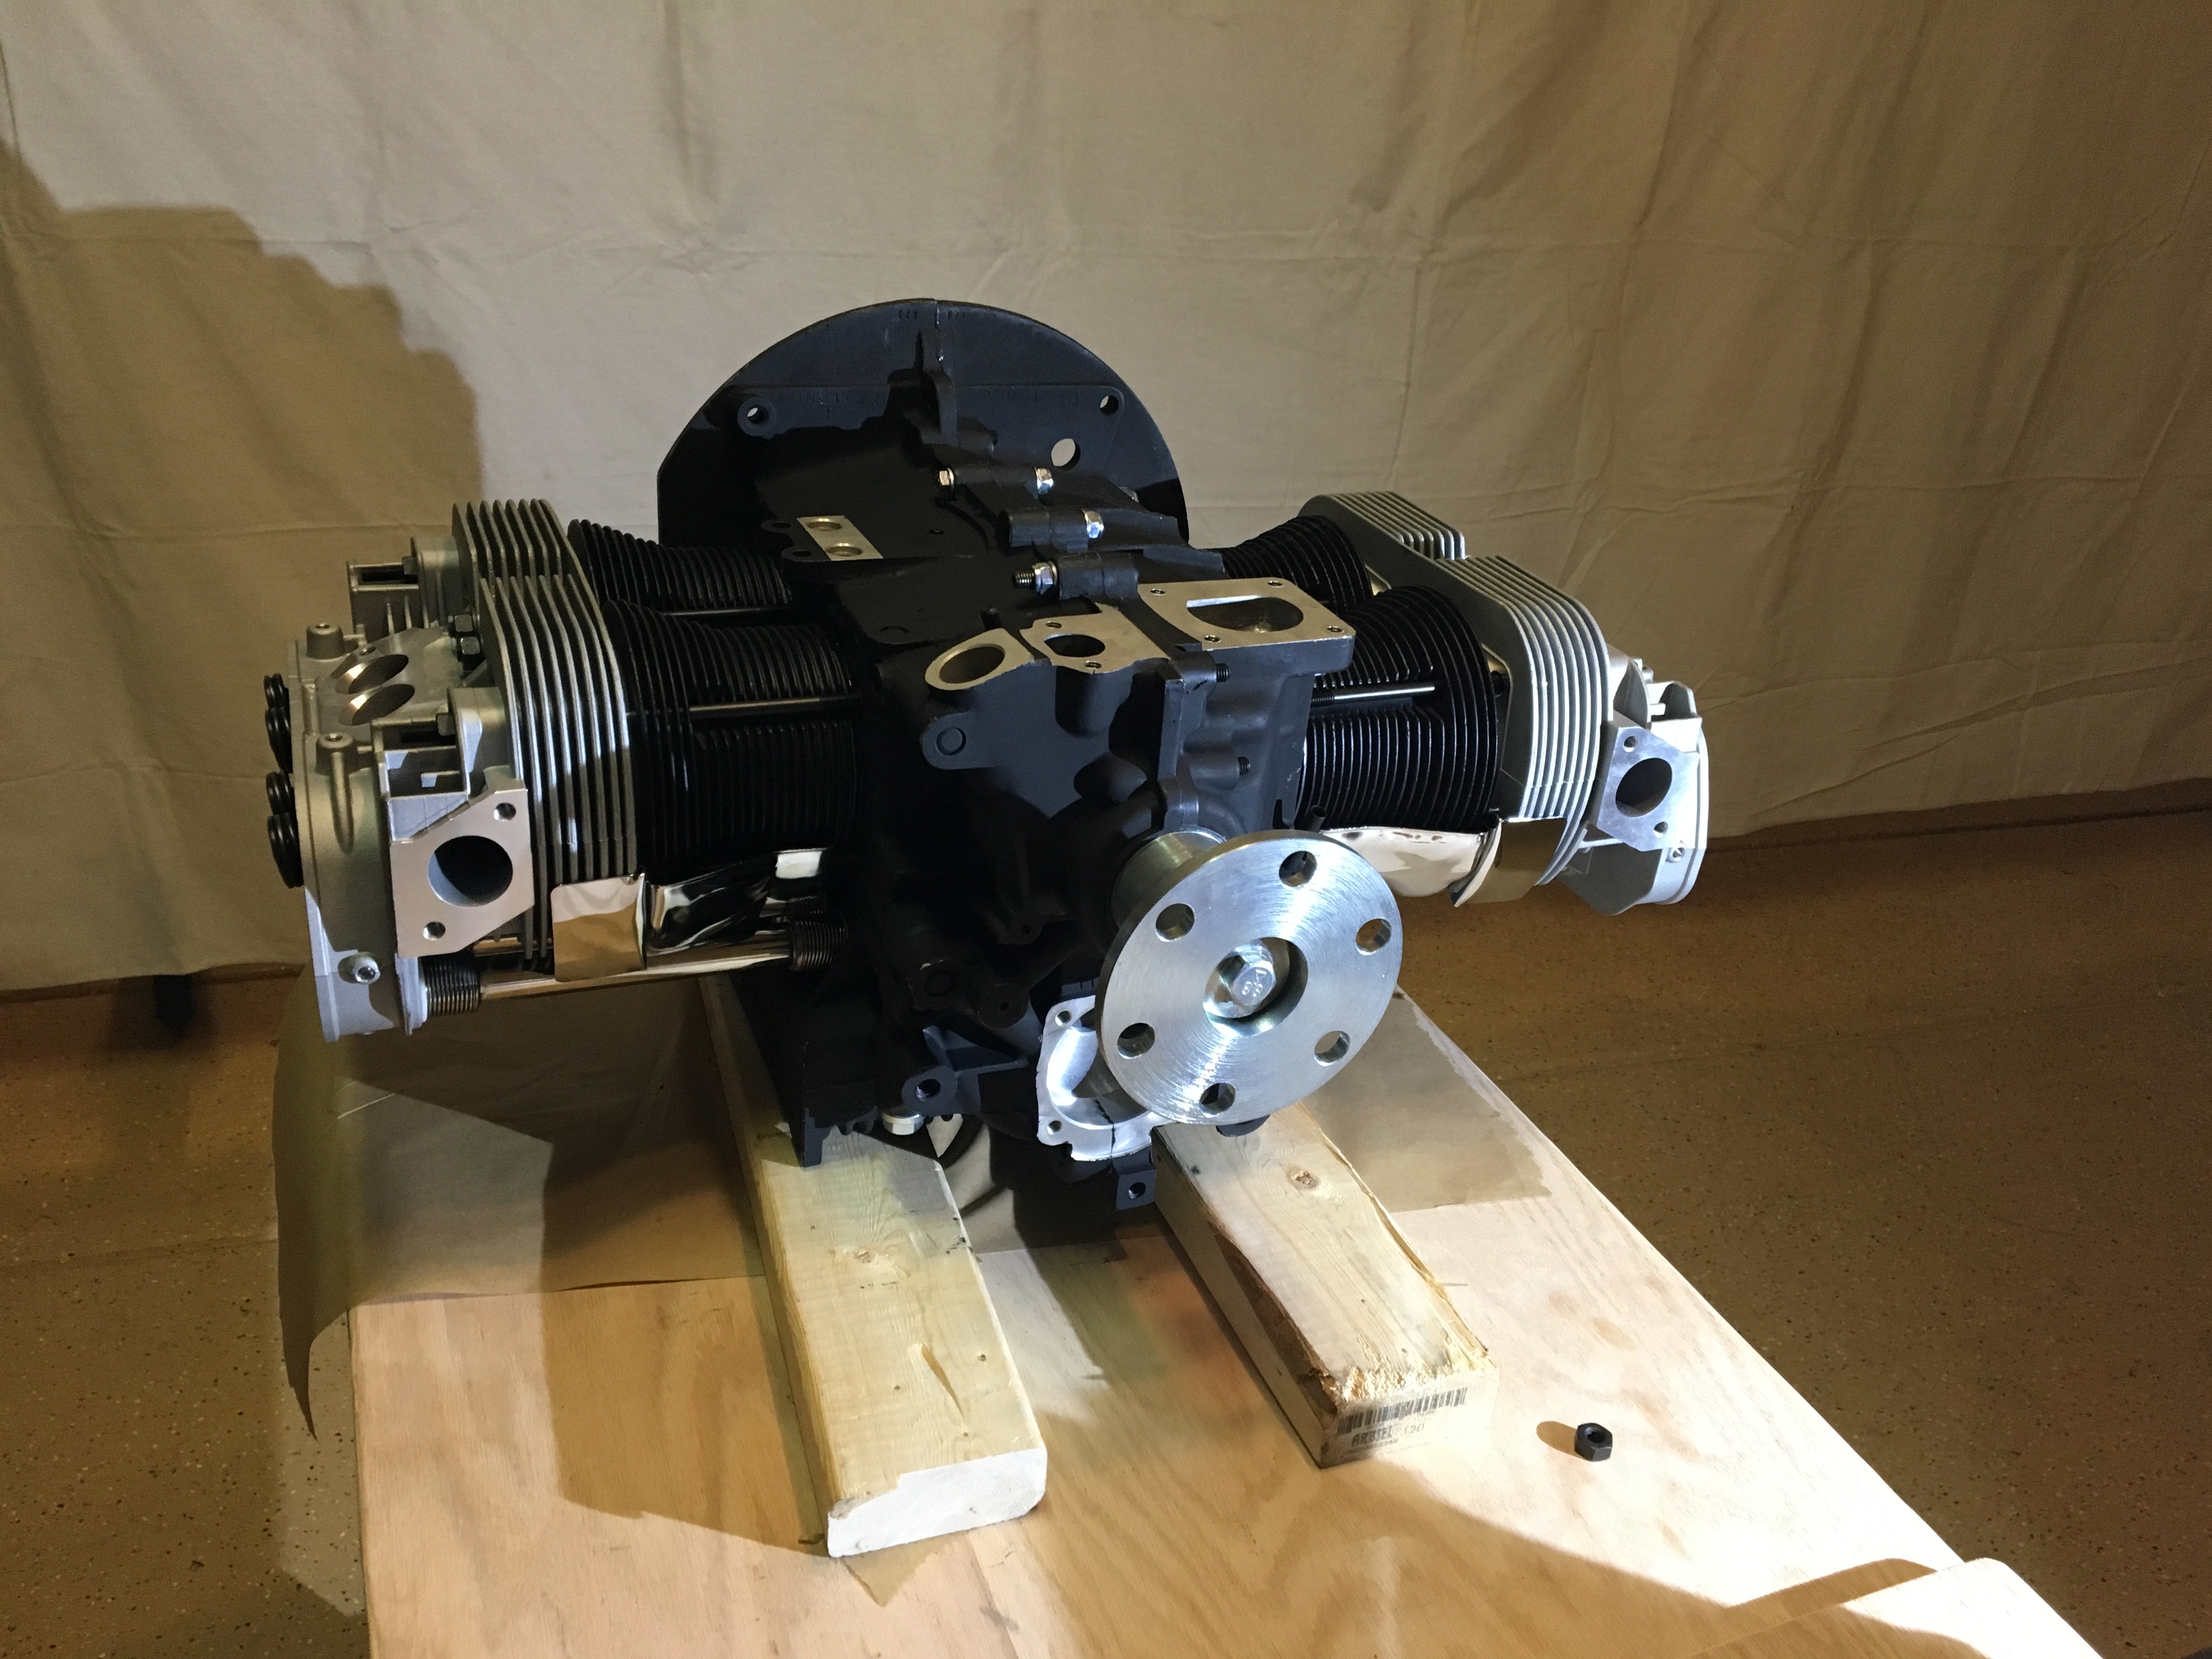
Engine Work Continues
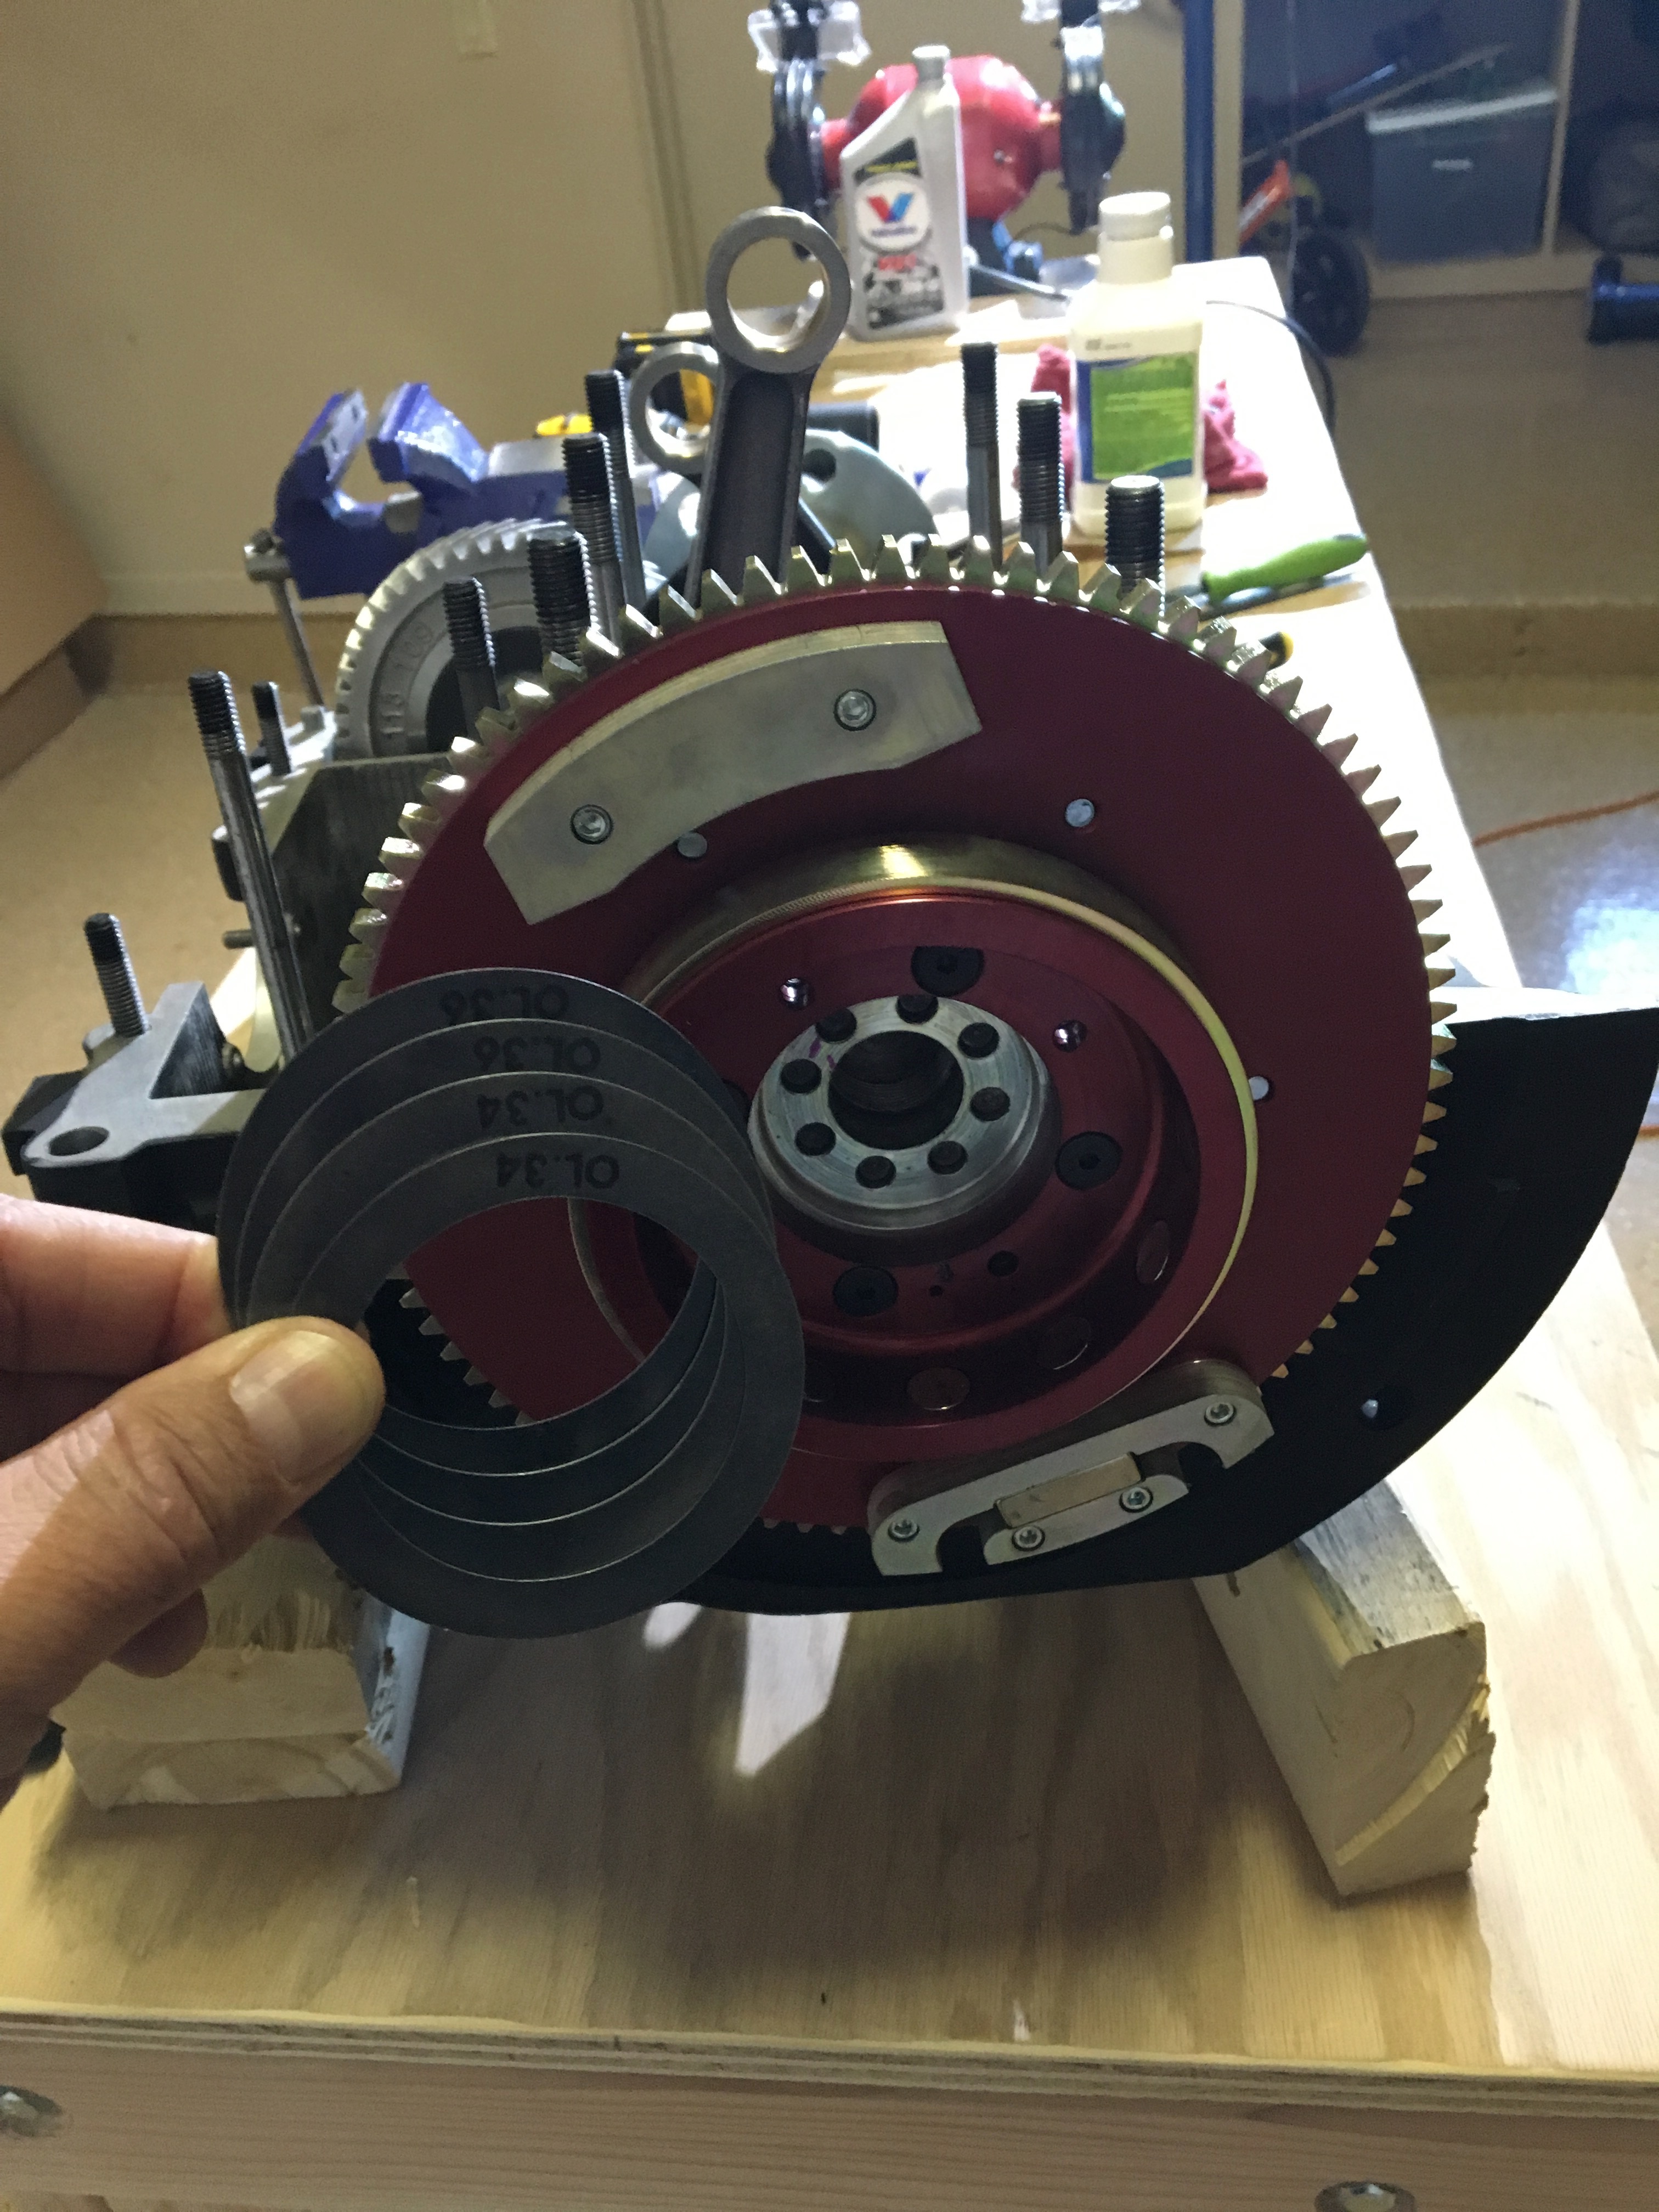
Flywheel arrived! I got it Monday like Sonex promised but I wasn’t able to work on it until today. And boy what a productive day!
Yesterday, double tailwheel lesson. Practiced all kinds of landings, even one-wheel landings…. freaky… and awesome!
Today I:
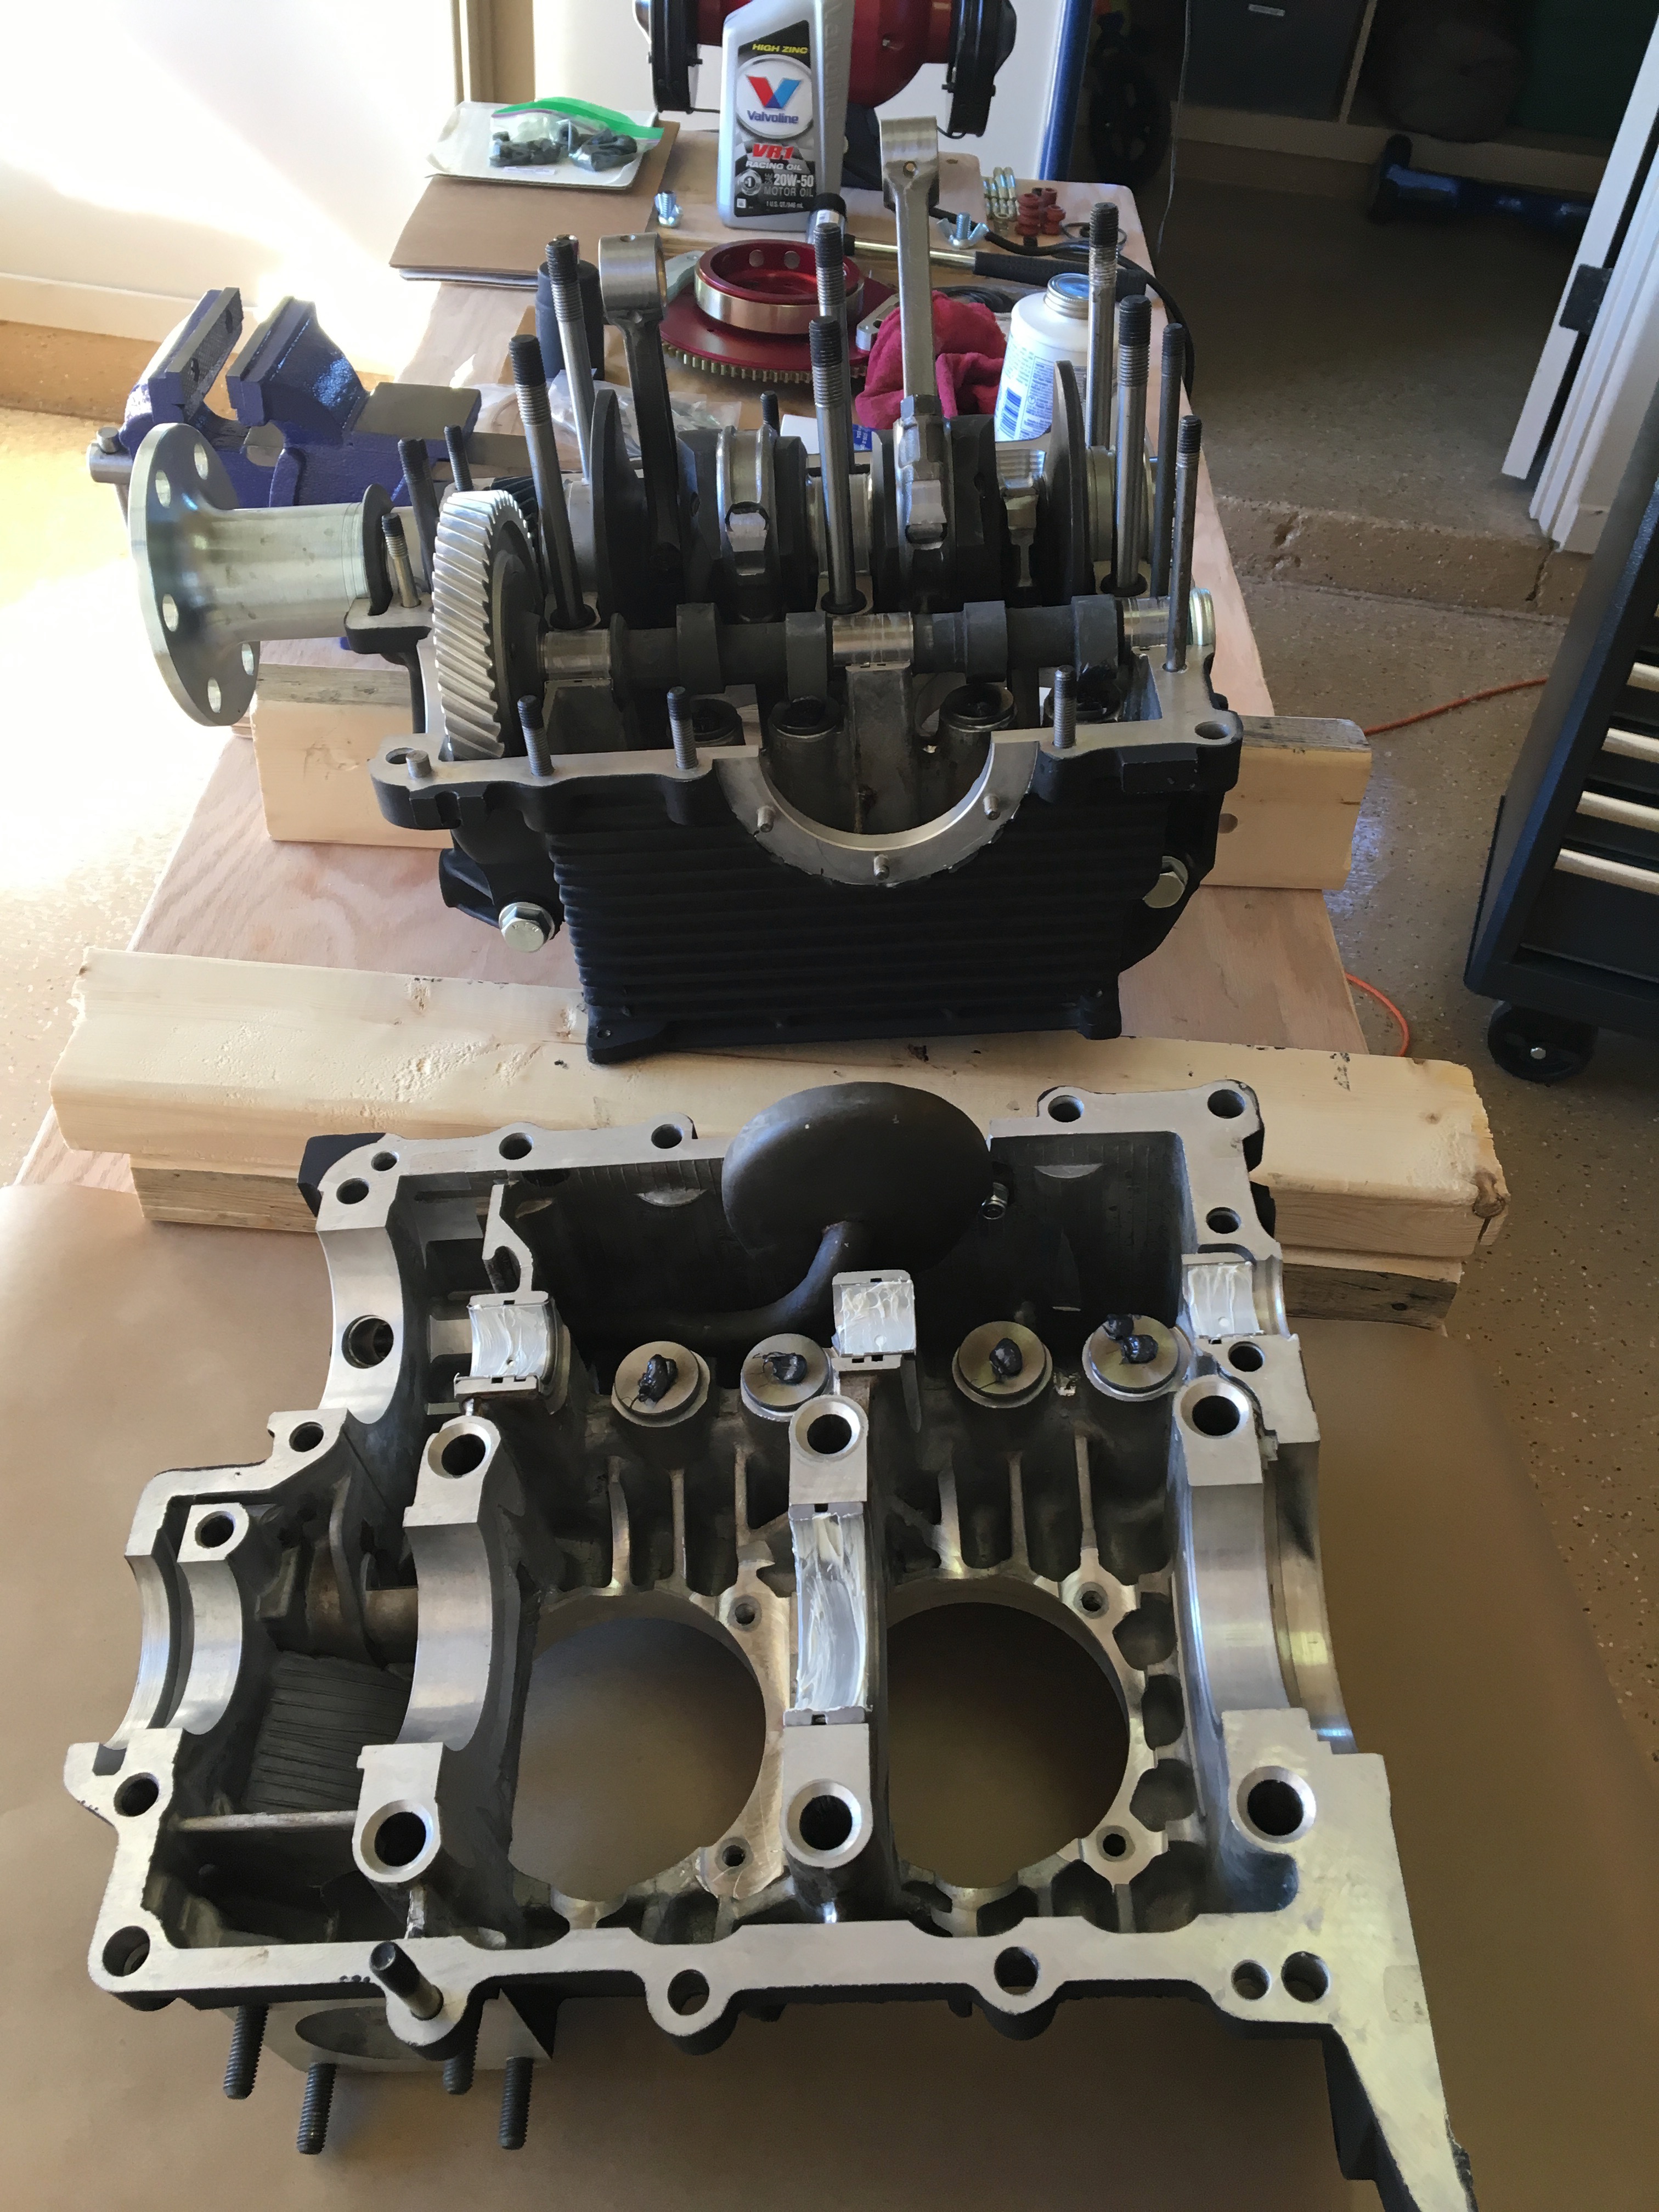
- Married the two halves of the casing together. Goodness, I hope I didn’t forget a part in there.
- Inspected all the piston rings. More on this below.
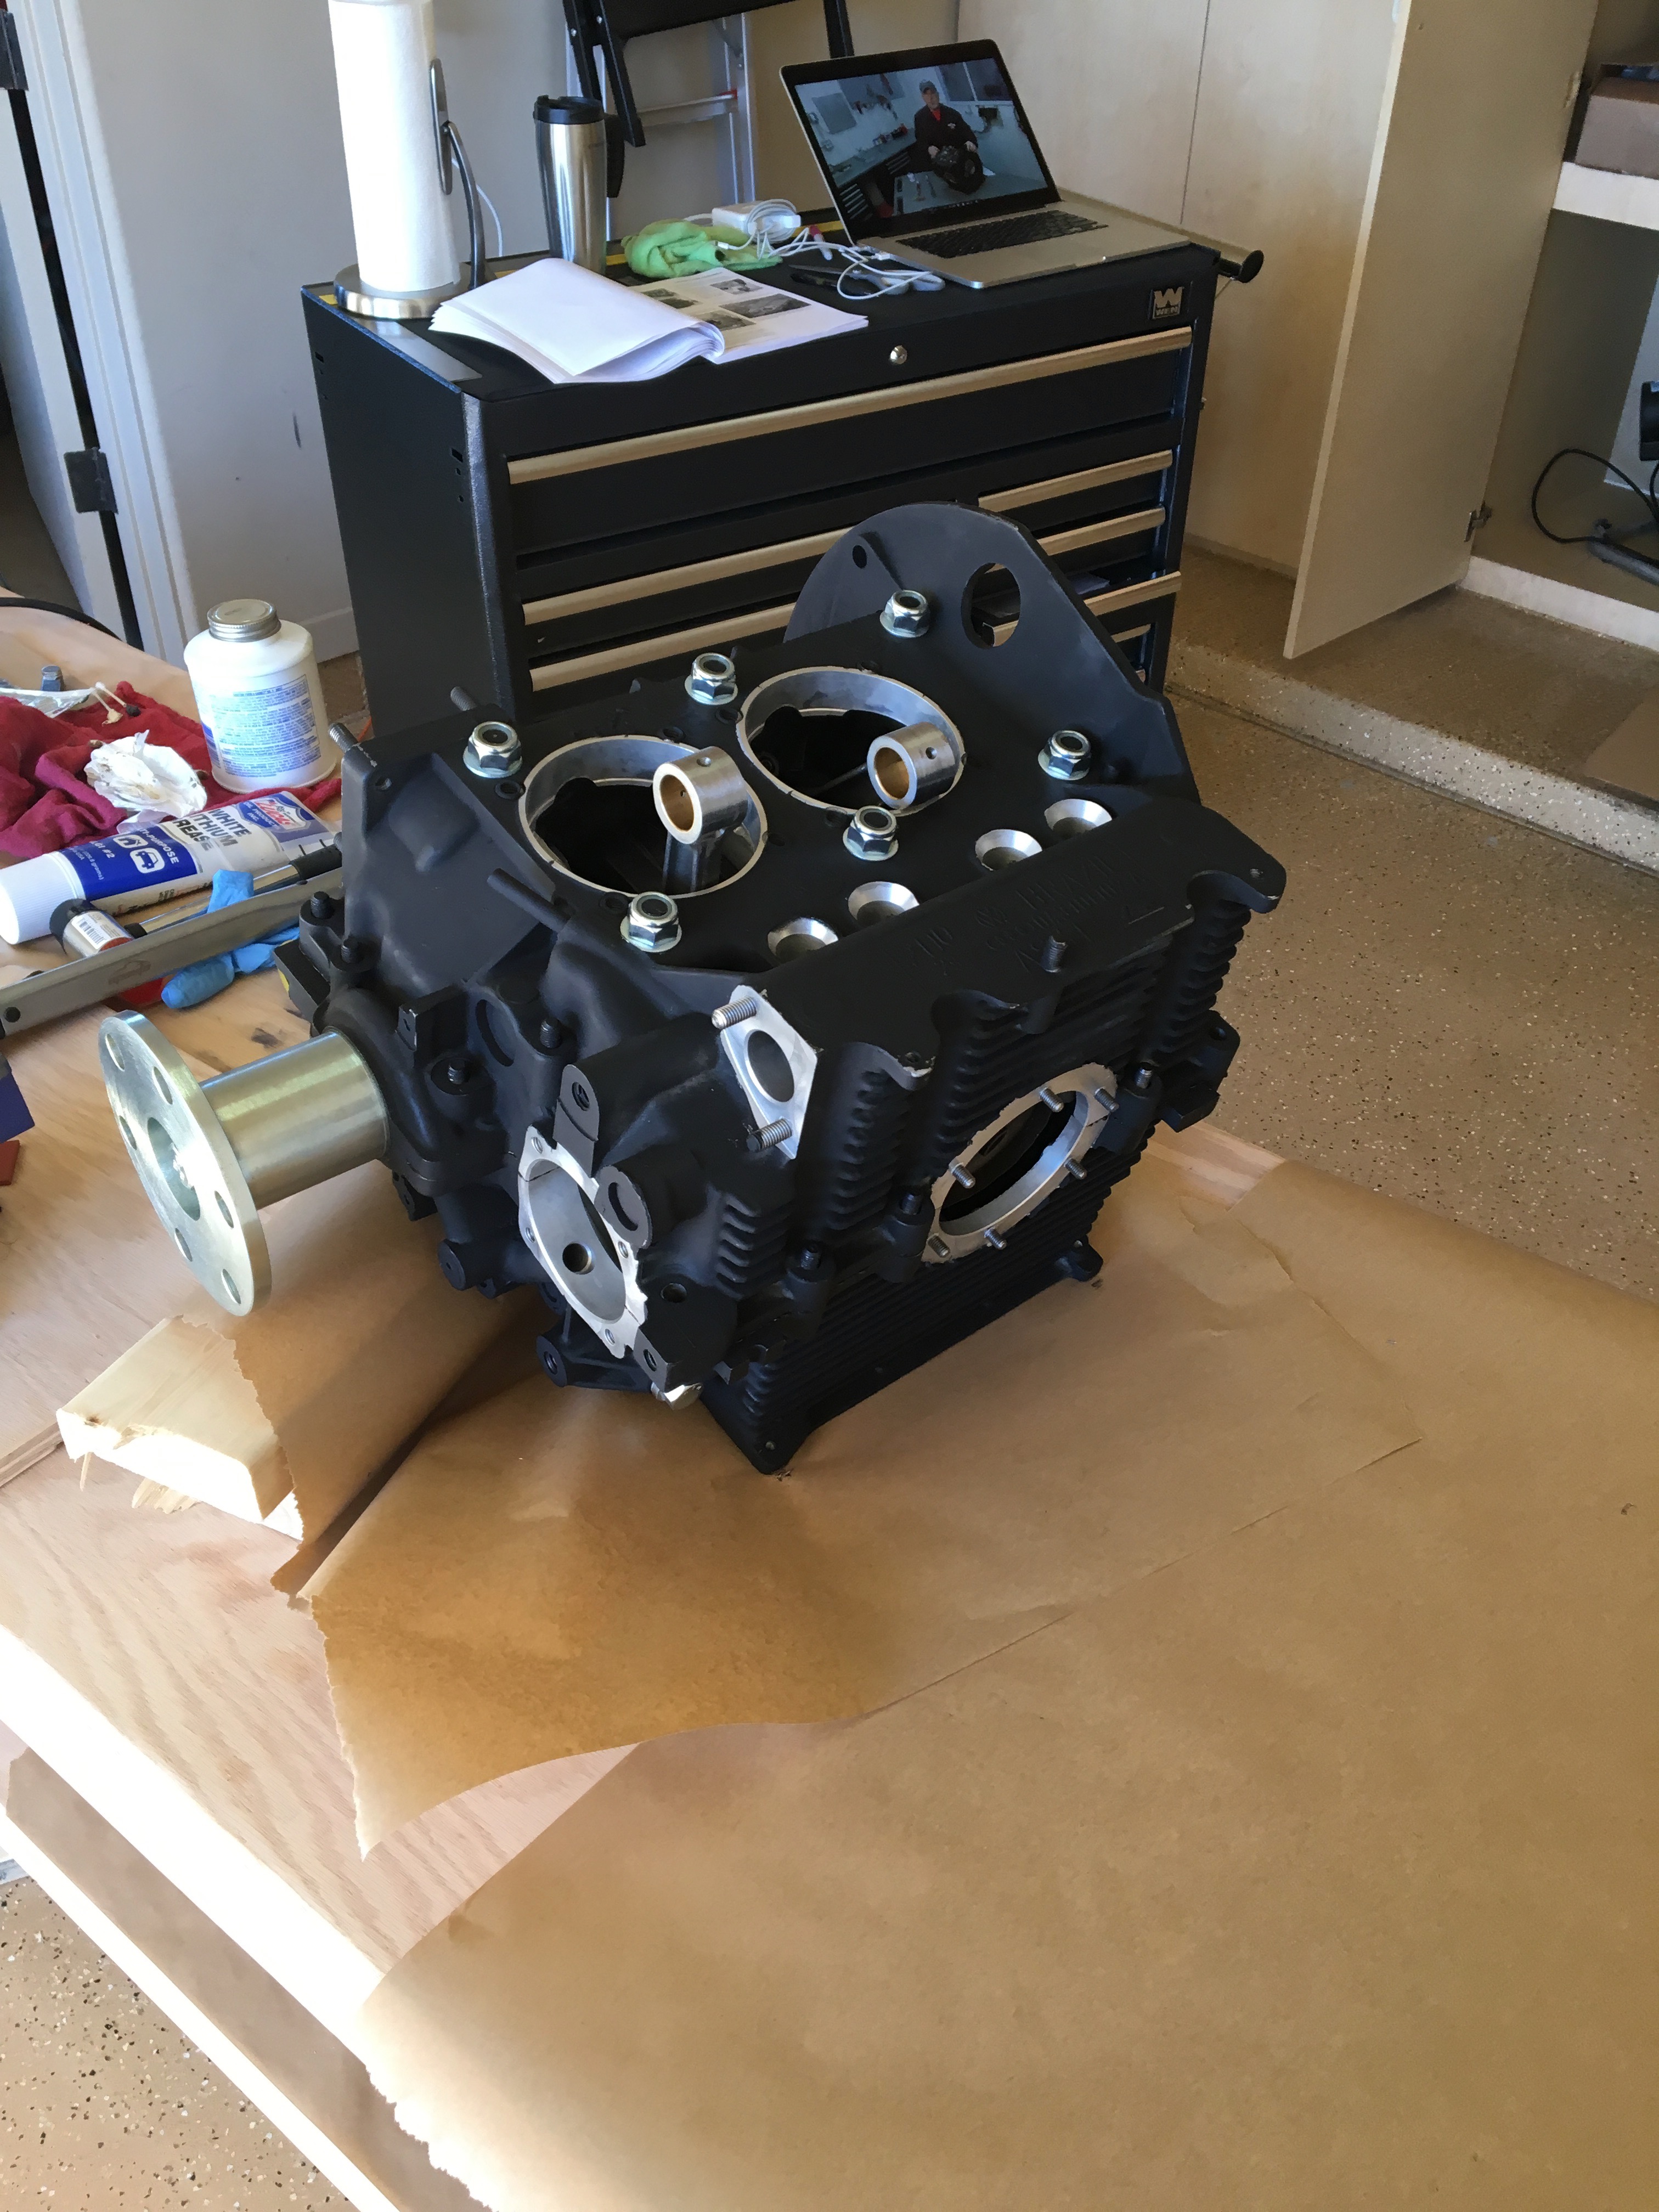
- Mounted cylinders and attached connecting rods to pistons
- Started connecting the cylinder heads, more to do here.
Starting to look like an engine!
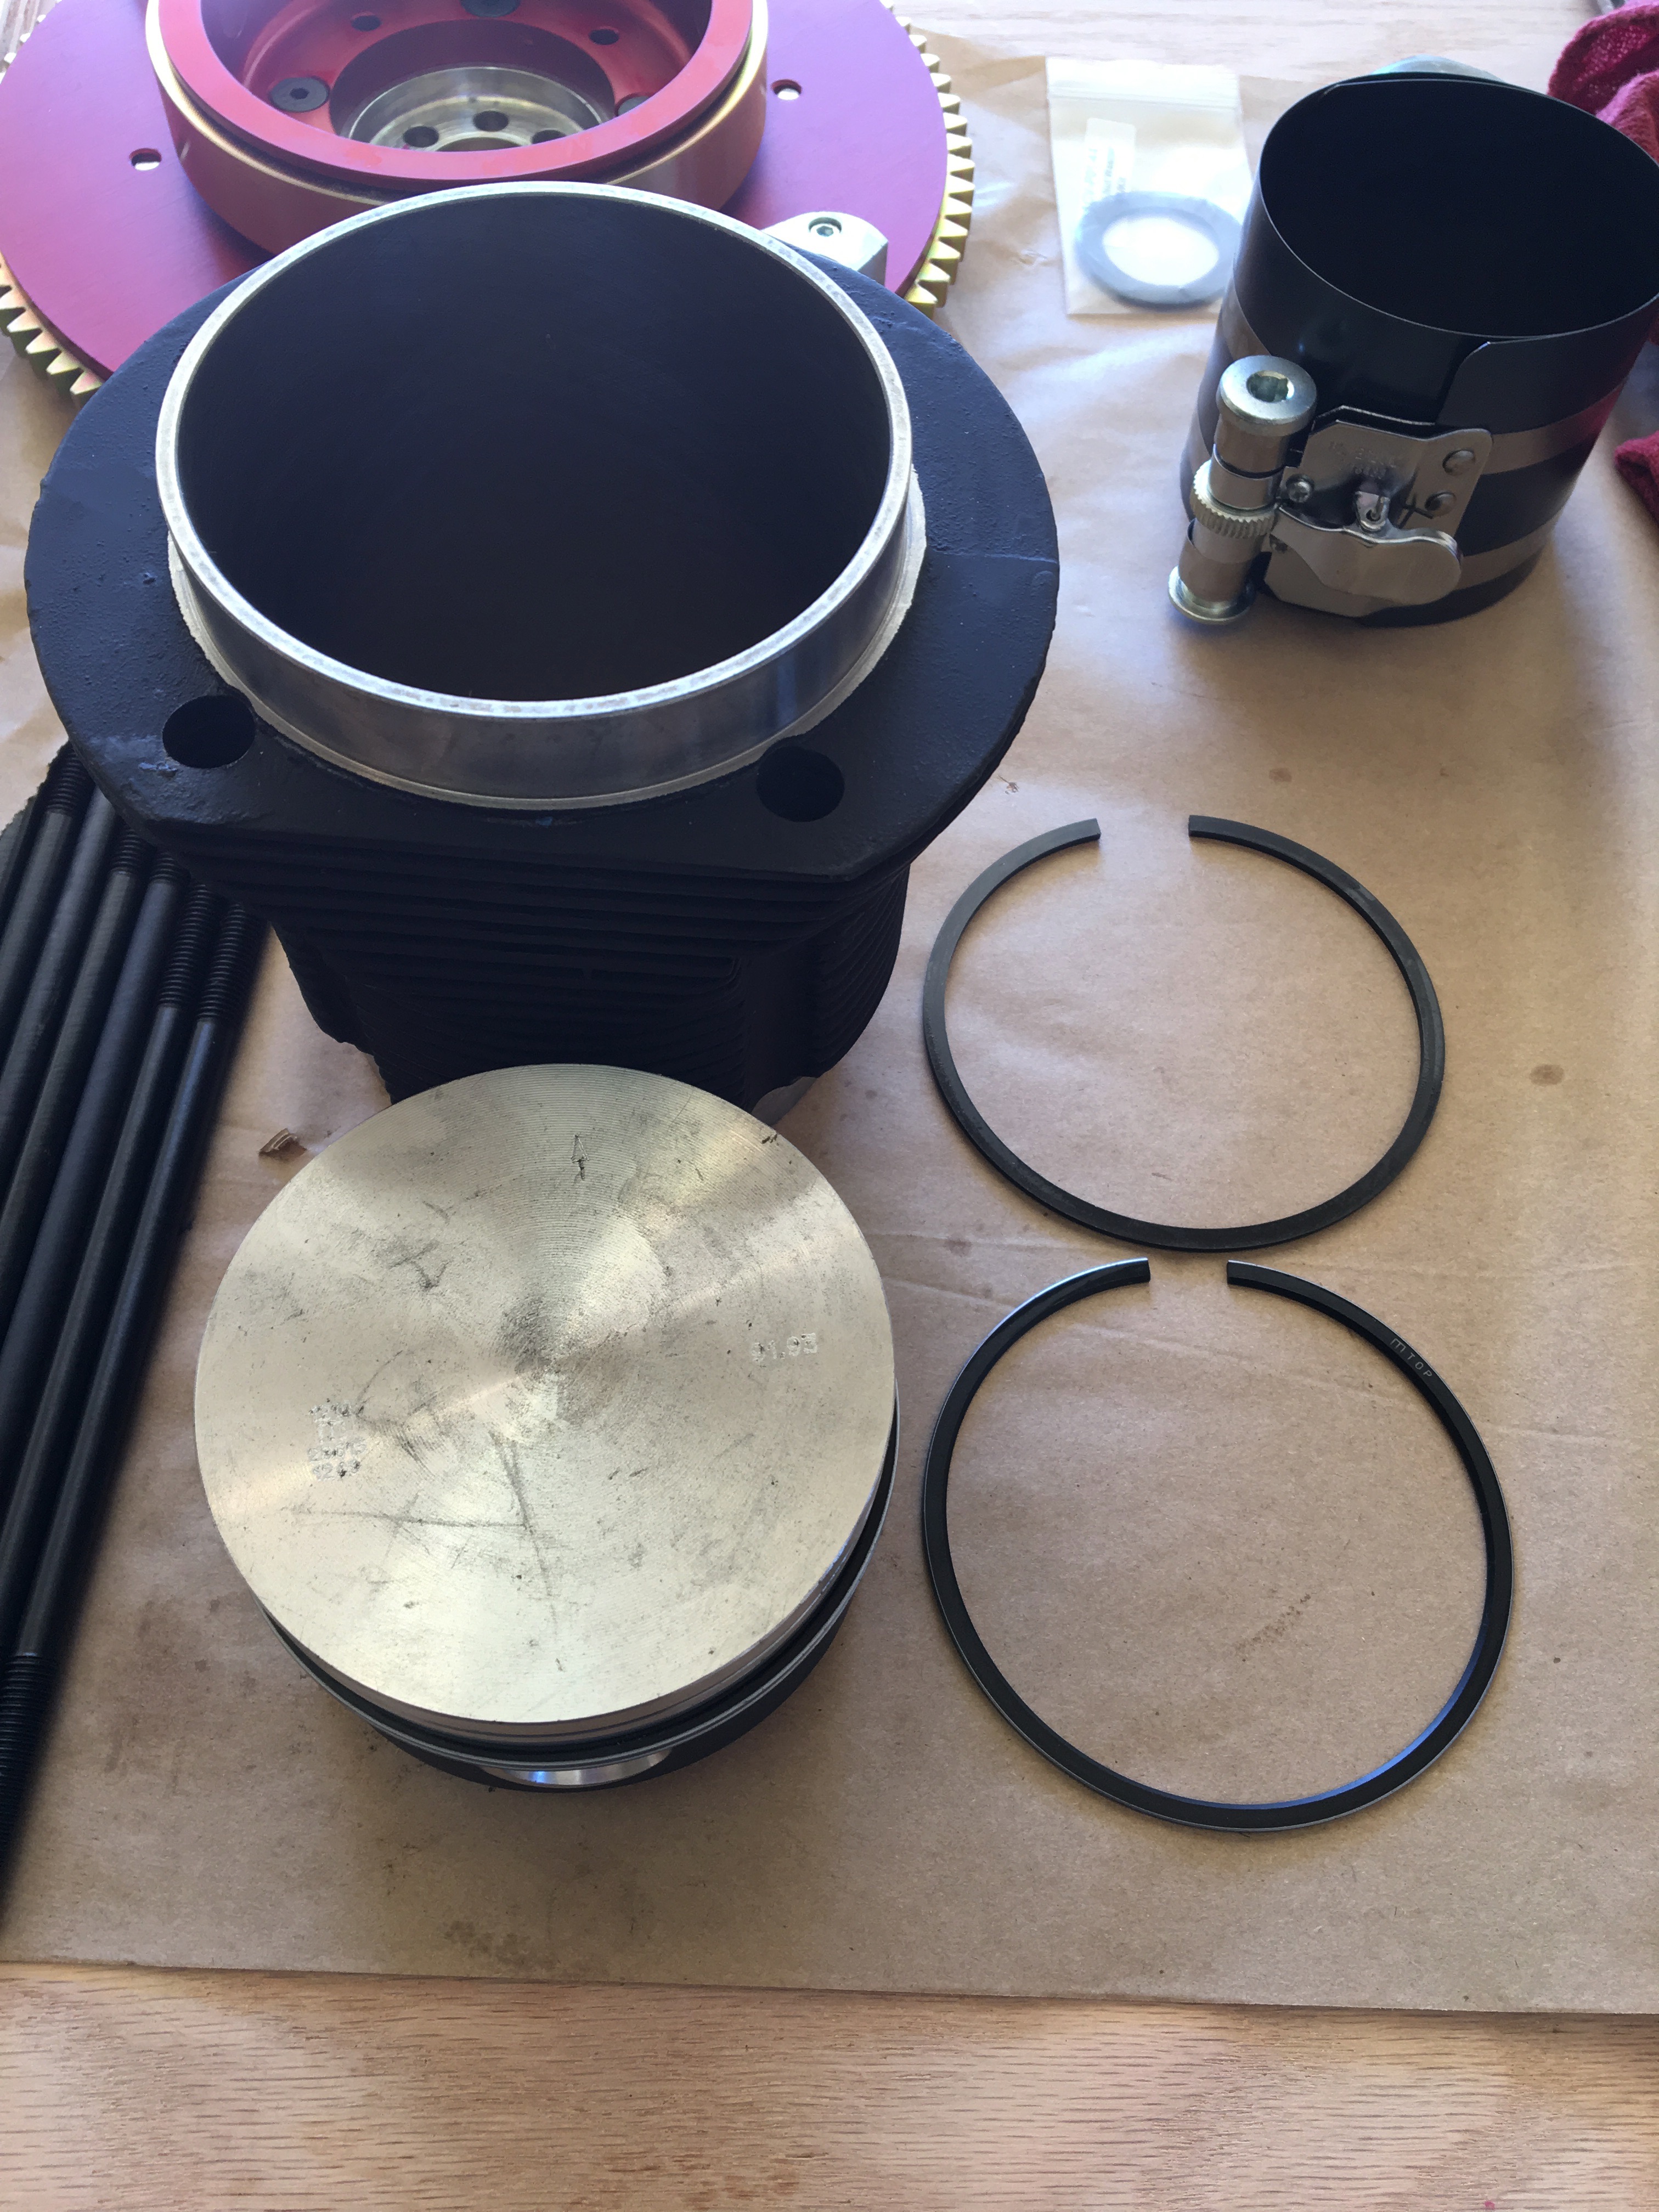
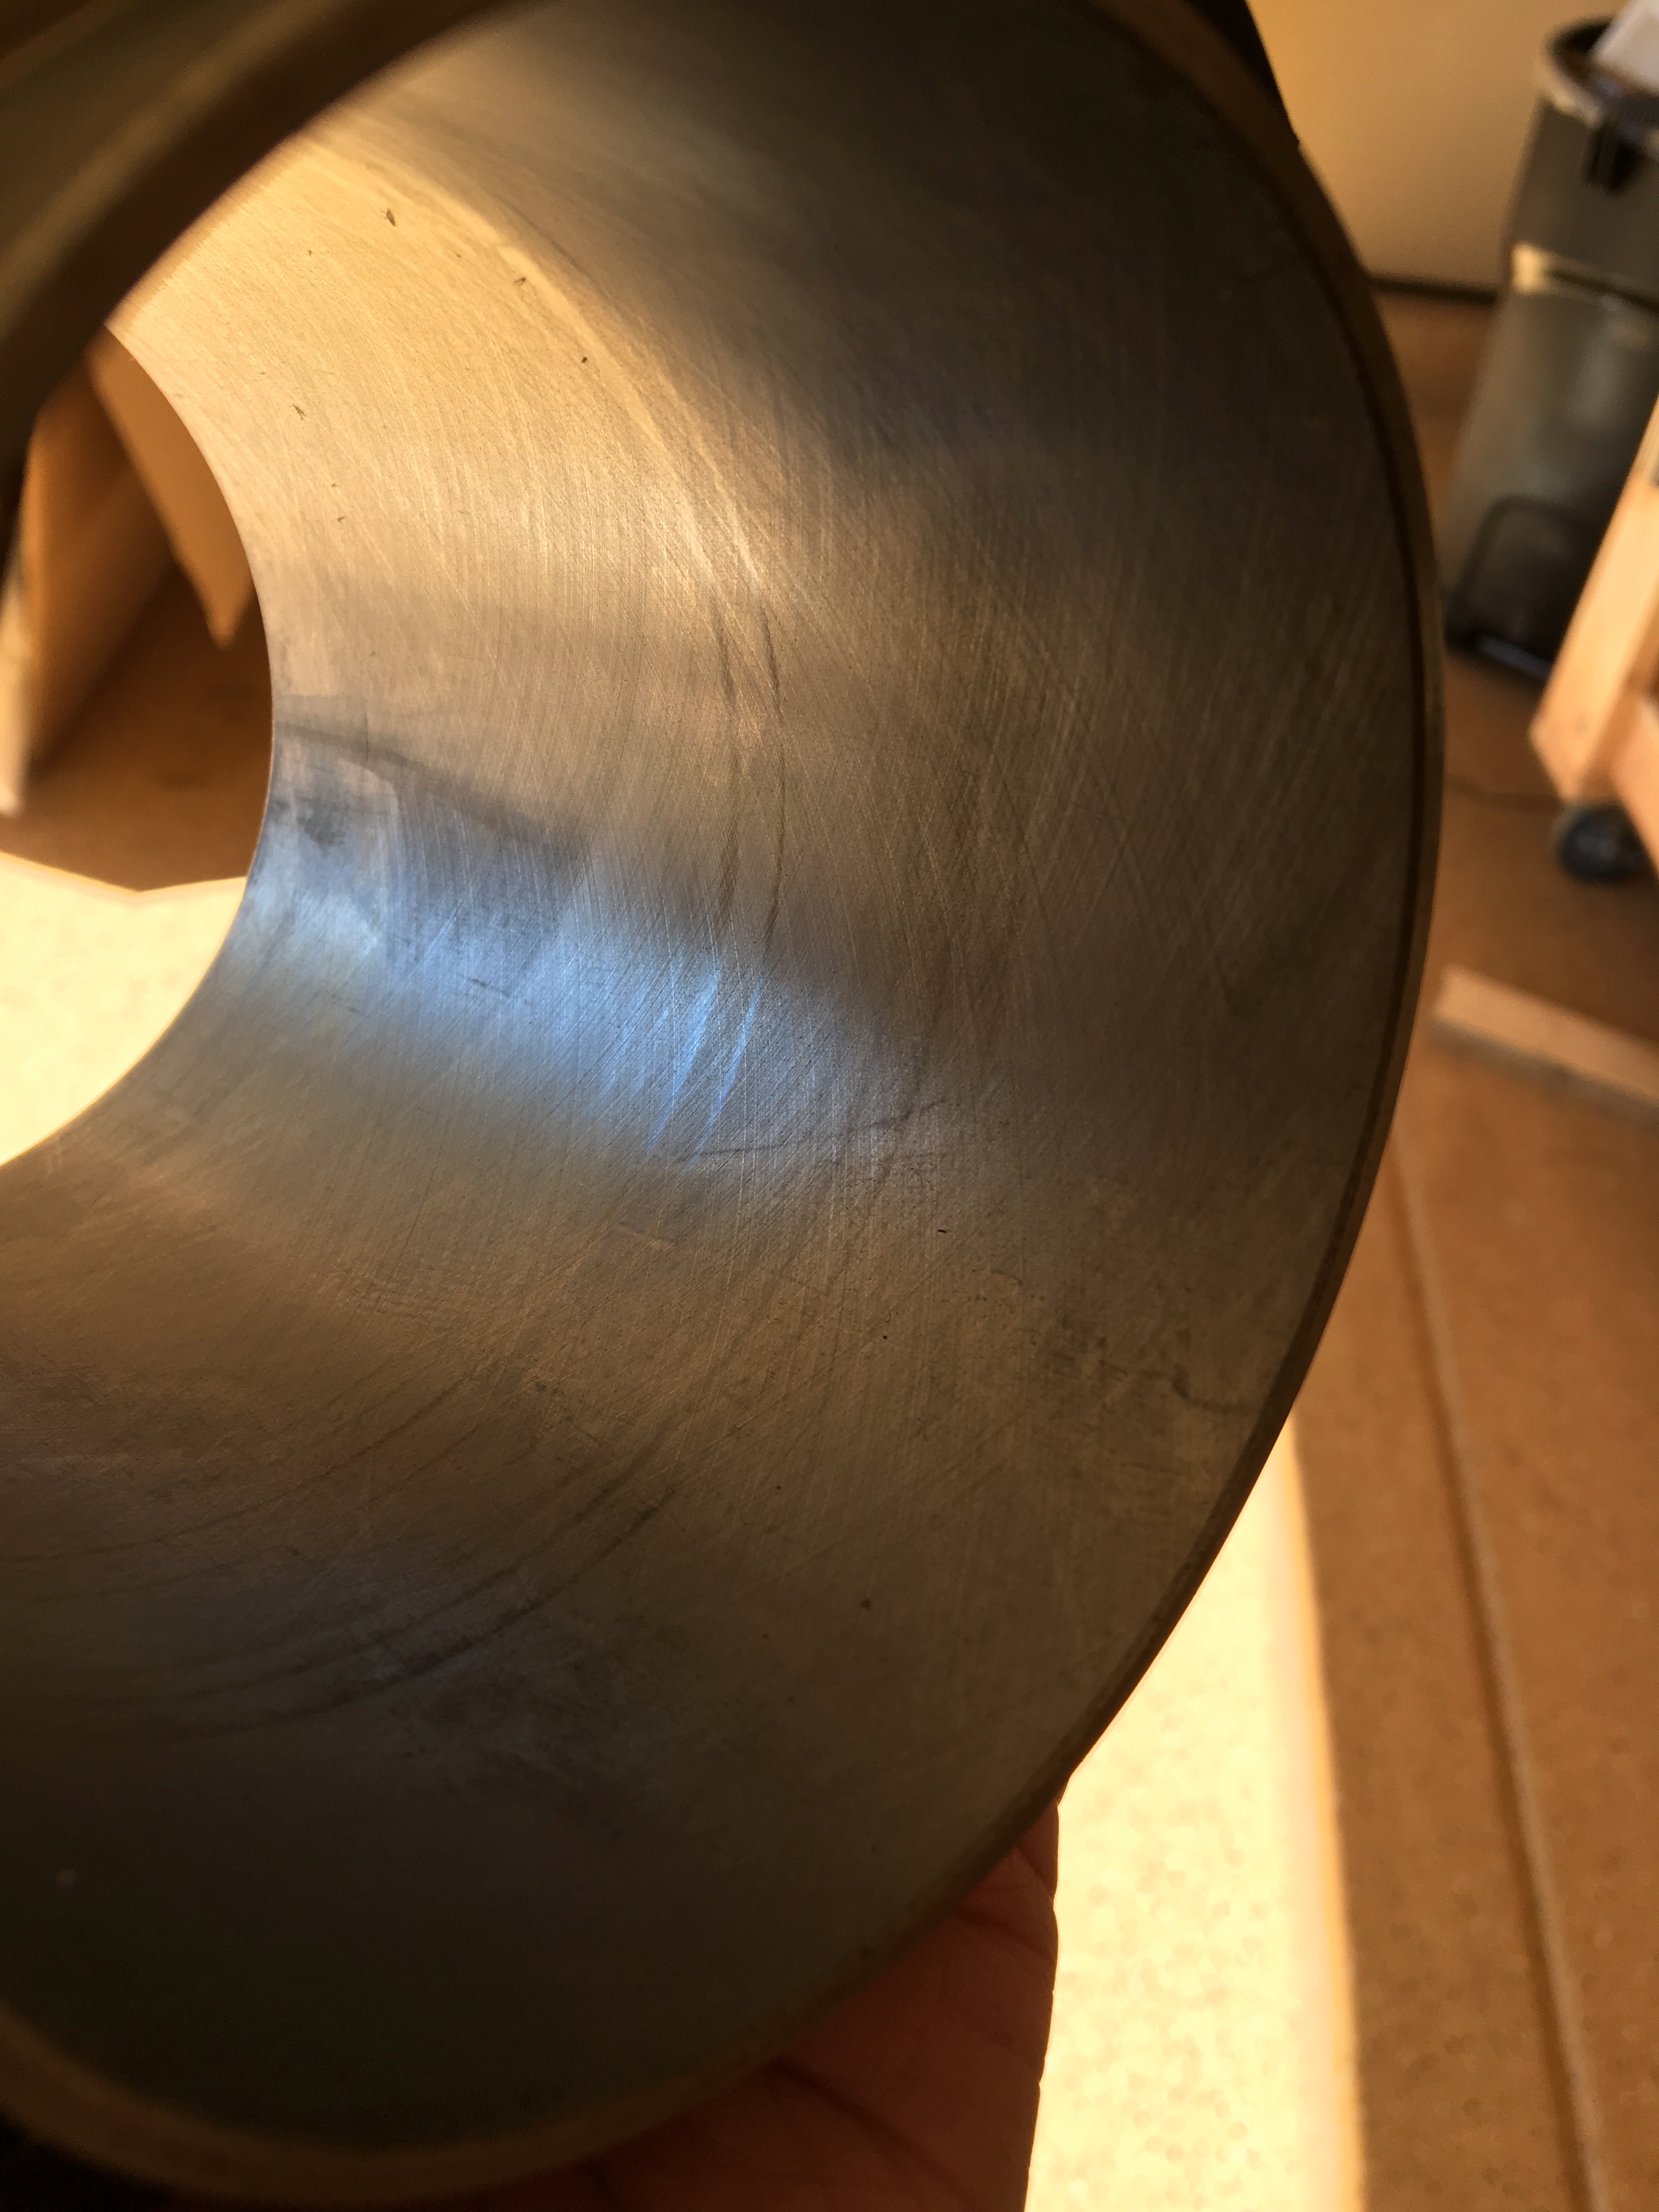
Fun Fact: Below is an image of the inside wall of a cylinder. See if you can make out the criss-cross texture of the wall. Why is it like that? Good question. Also note the previous picture with the piston and rings. Those rings go around the piston and make a tight seal with the cylinder wall. Well not tight enough. Ultimately, we want the cylinder rings and wall to make such a smooth surface that oil is able to seep through on a molecular level only. During break-in, engine are run at high power to force those rings to rub hard against the wall. That criss-cross pattern provides a uniform “grinding” surface that will wear down to the shape and size of the rings. You know an engine is broken-in when it stops consuming lots of oil. Initially, new engines lose a quart of oil every hour or two. That’ll go down to as little as a quart every 30 hours in some cases. At least that’s how I understand it. If you know better, let me know and I’ll update this blog.
I’m missing a washer. You’ll see the lonely nut in the last picture. I probably dropped it but I can’t find it anywhere. Even checked inside the cylinder heads, whew. Tomorrow I’ll go to the hardware store and see if I can find one identical.