Elevator
Primary activity today: filing sheet metal holes. I’ll explain.
Next up on the controls was the control stick and elevator rods. The control stick mounts on the front side of the main spar with the stick right in the middle. I was trying to figure out where to drill the holes to mount, when I saw some empty holes in the spar that match the control stick; but they were backwards. Doh! I riveted the spar together with the center beams backwards! Go figure. I had flipped those beams over so many time trying to figure out which way was right. No big deal. Some fresh rivets to plug those holes, drilled new holes solved the problem.
Once installed, the stick was too tight and wouldn’t move easily. That’s familiar. Disassembling and sanding out the mount bushing did the trick.
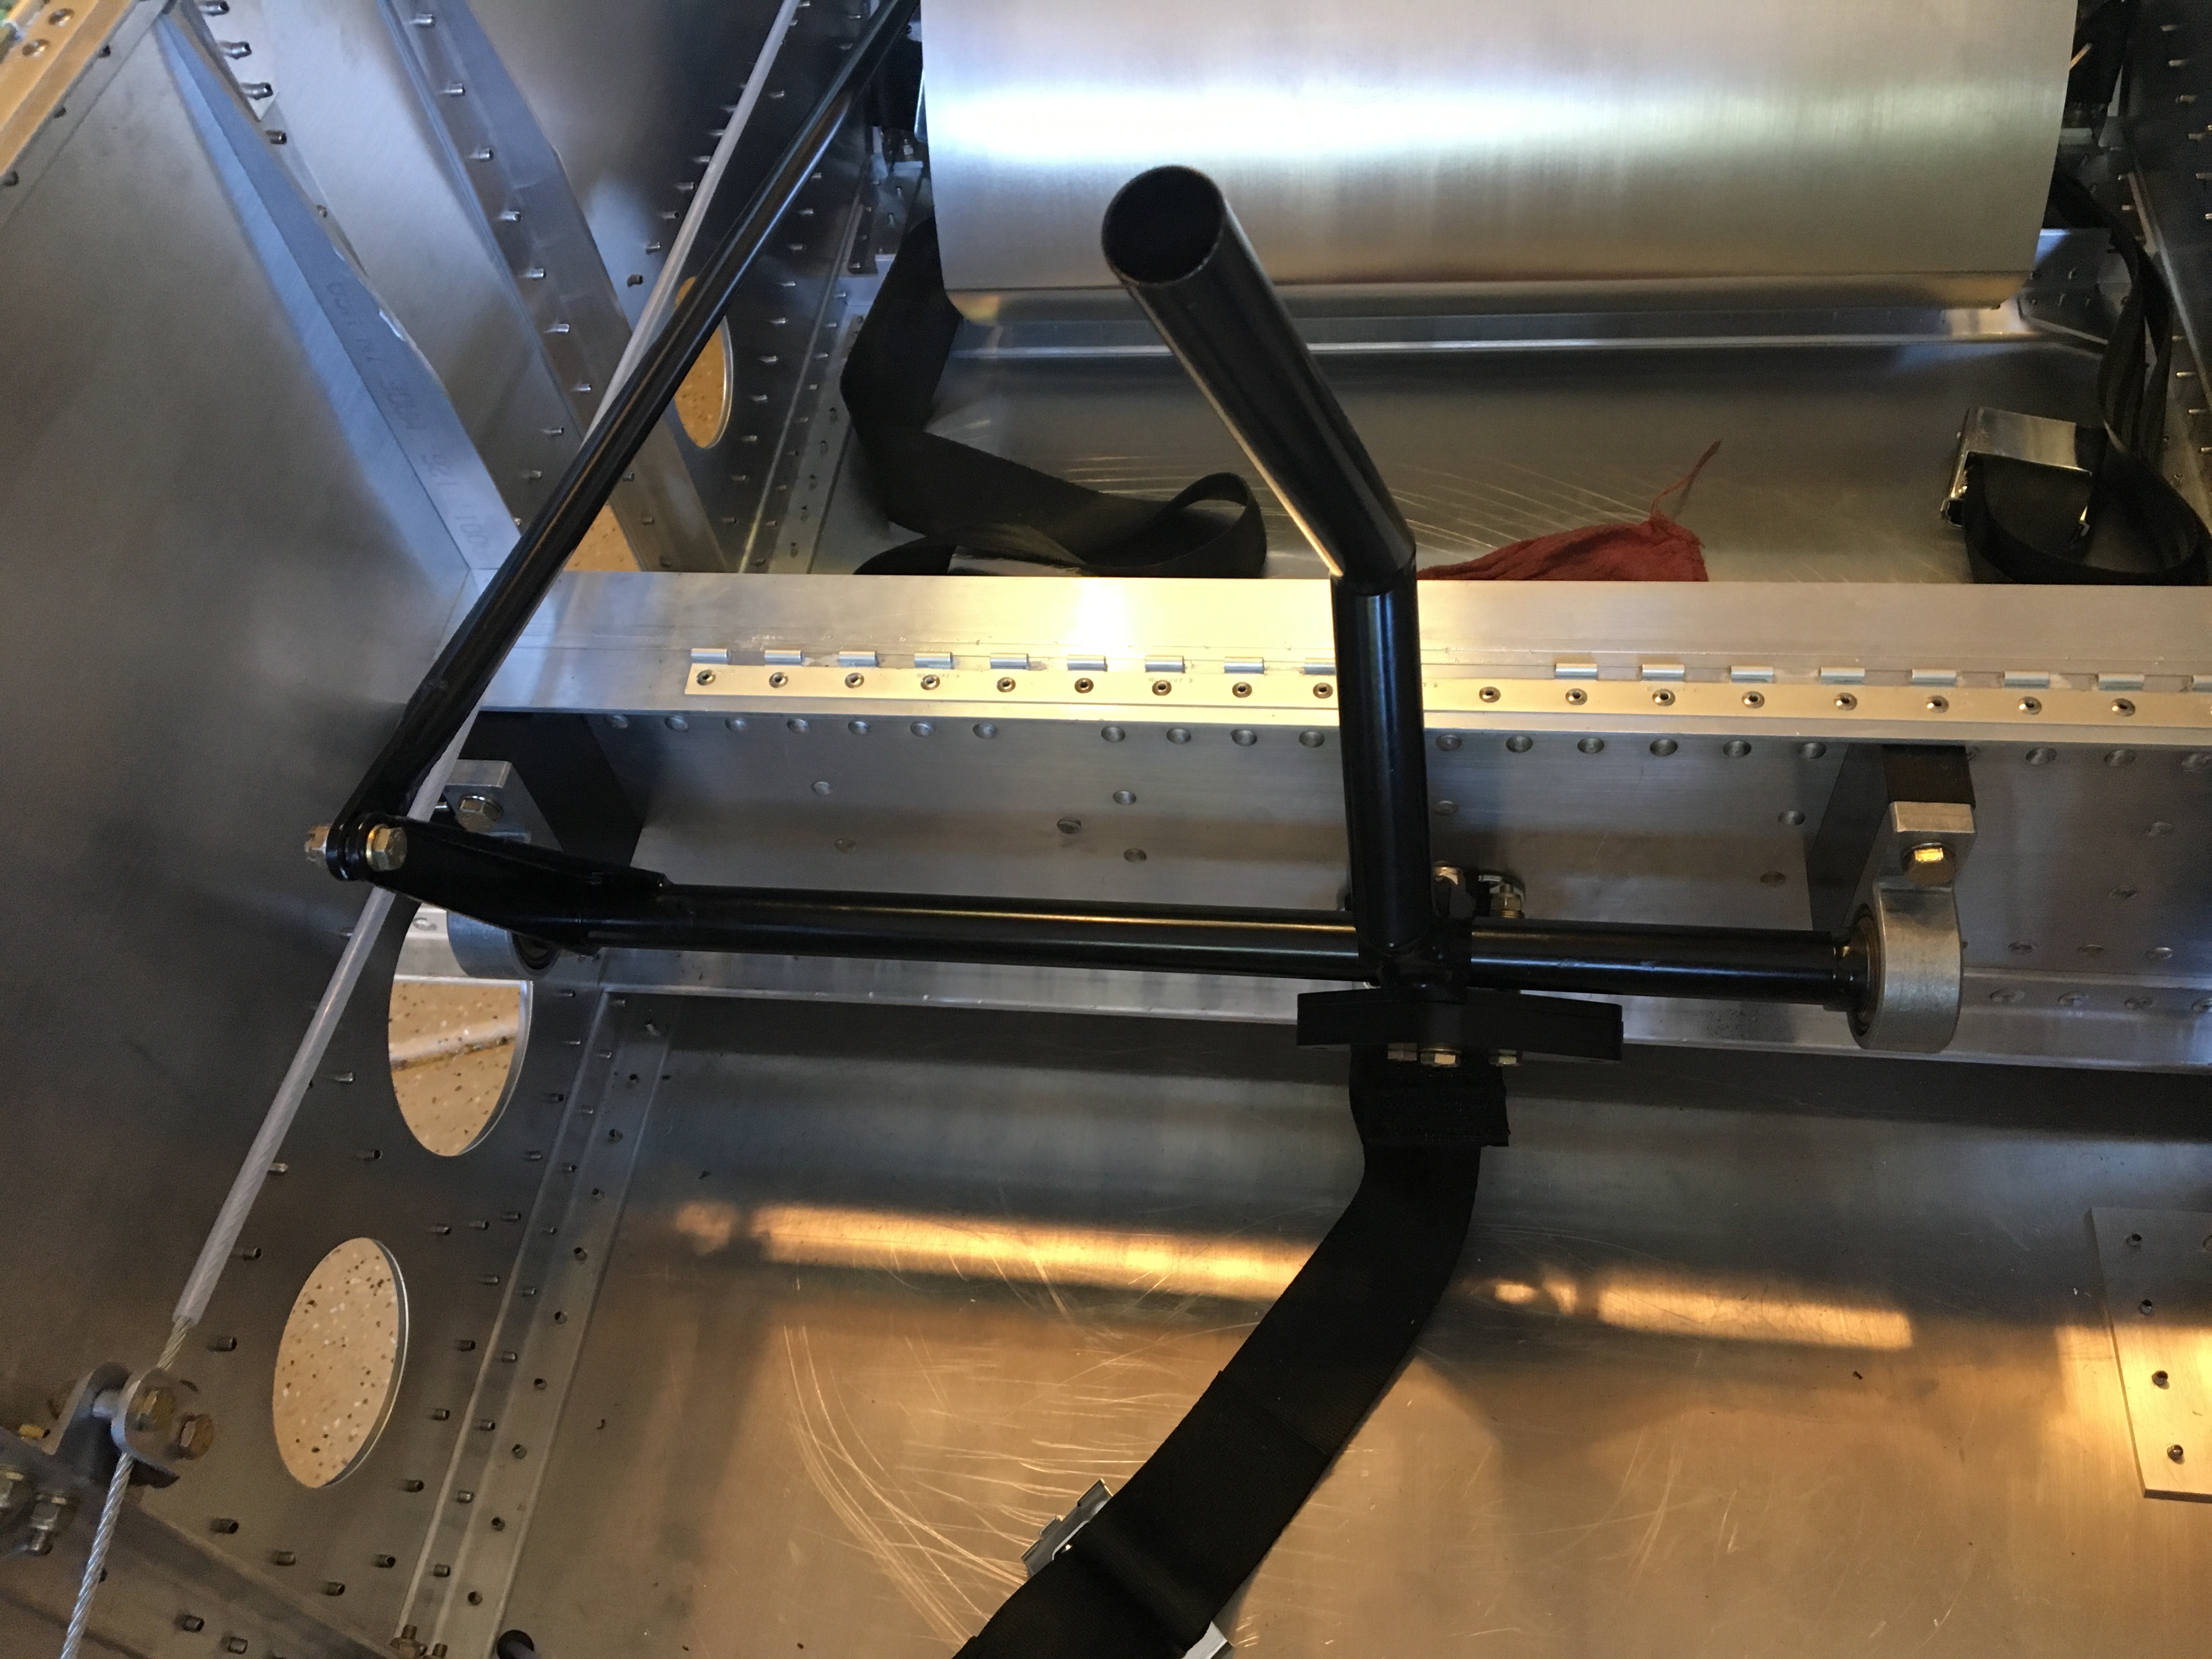
Then came the elevator connecting rods. There’s two rods; one connects to the control stick arm, and the other to the elevator horn all the way aft. In the middle they meet at this lever seen below. I forget what it’s called.
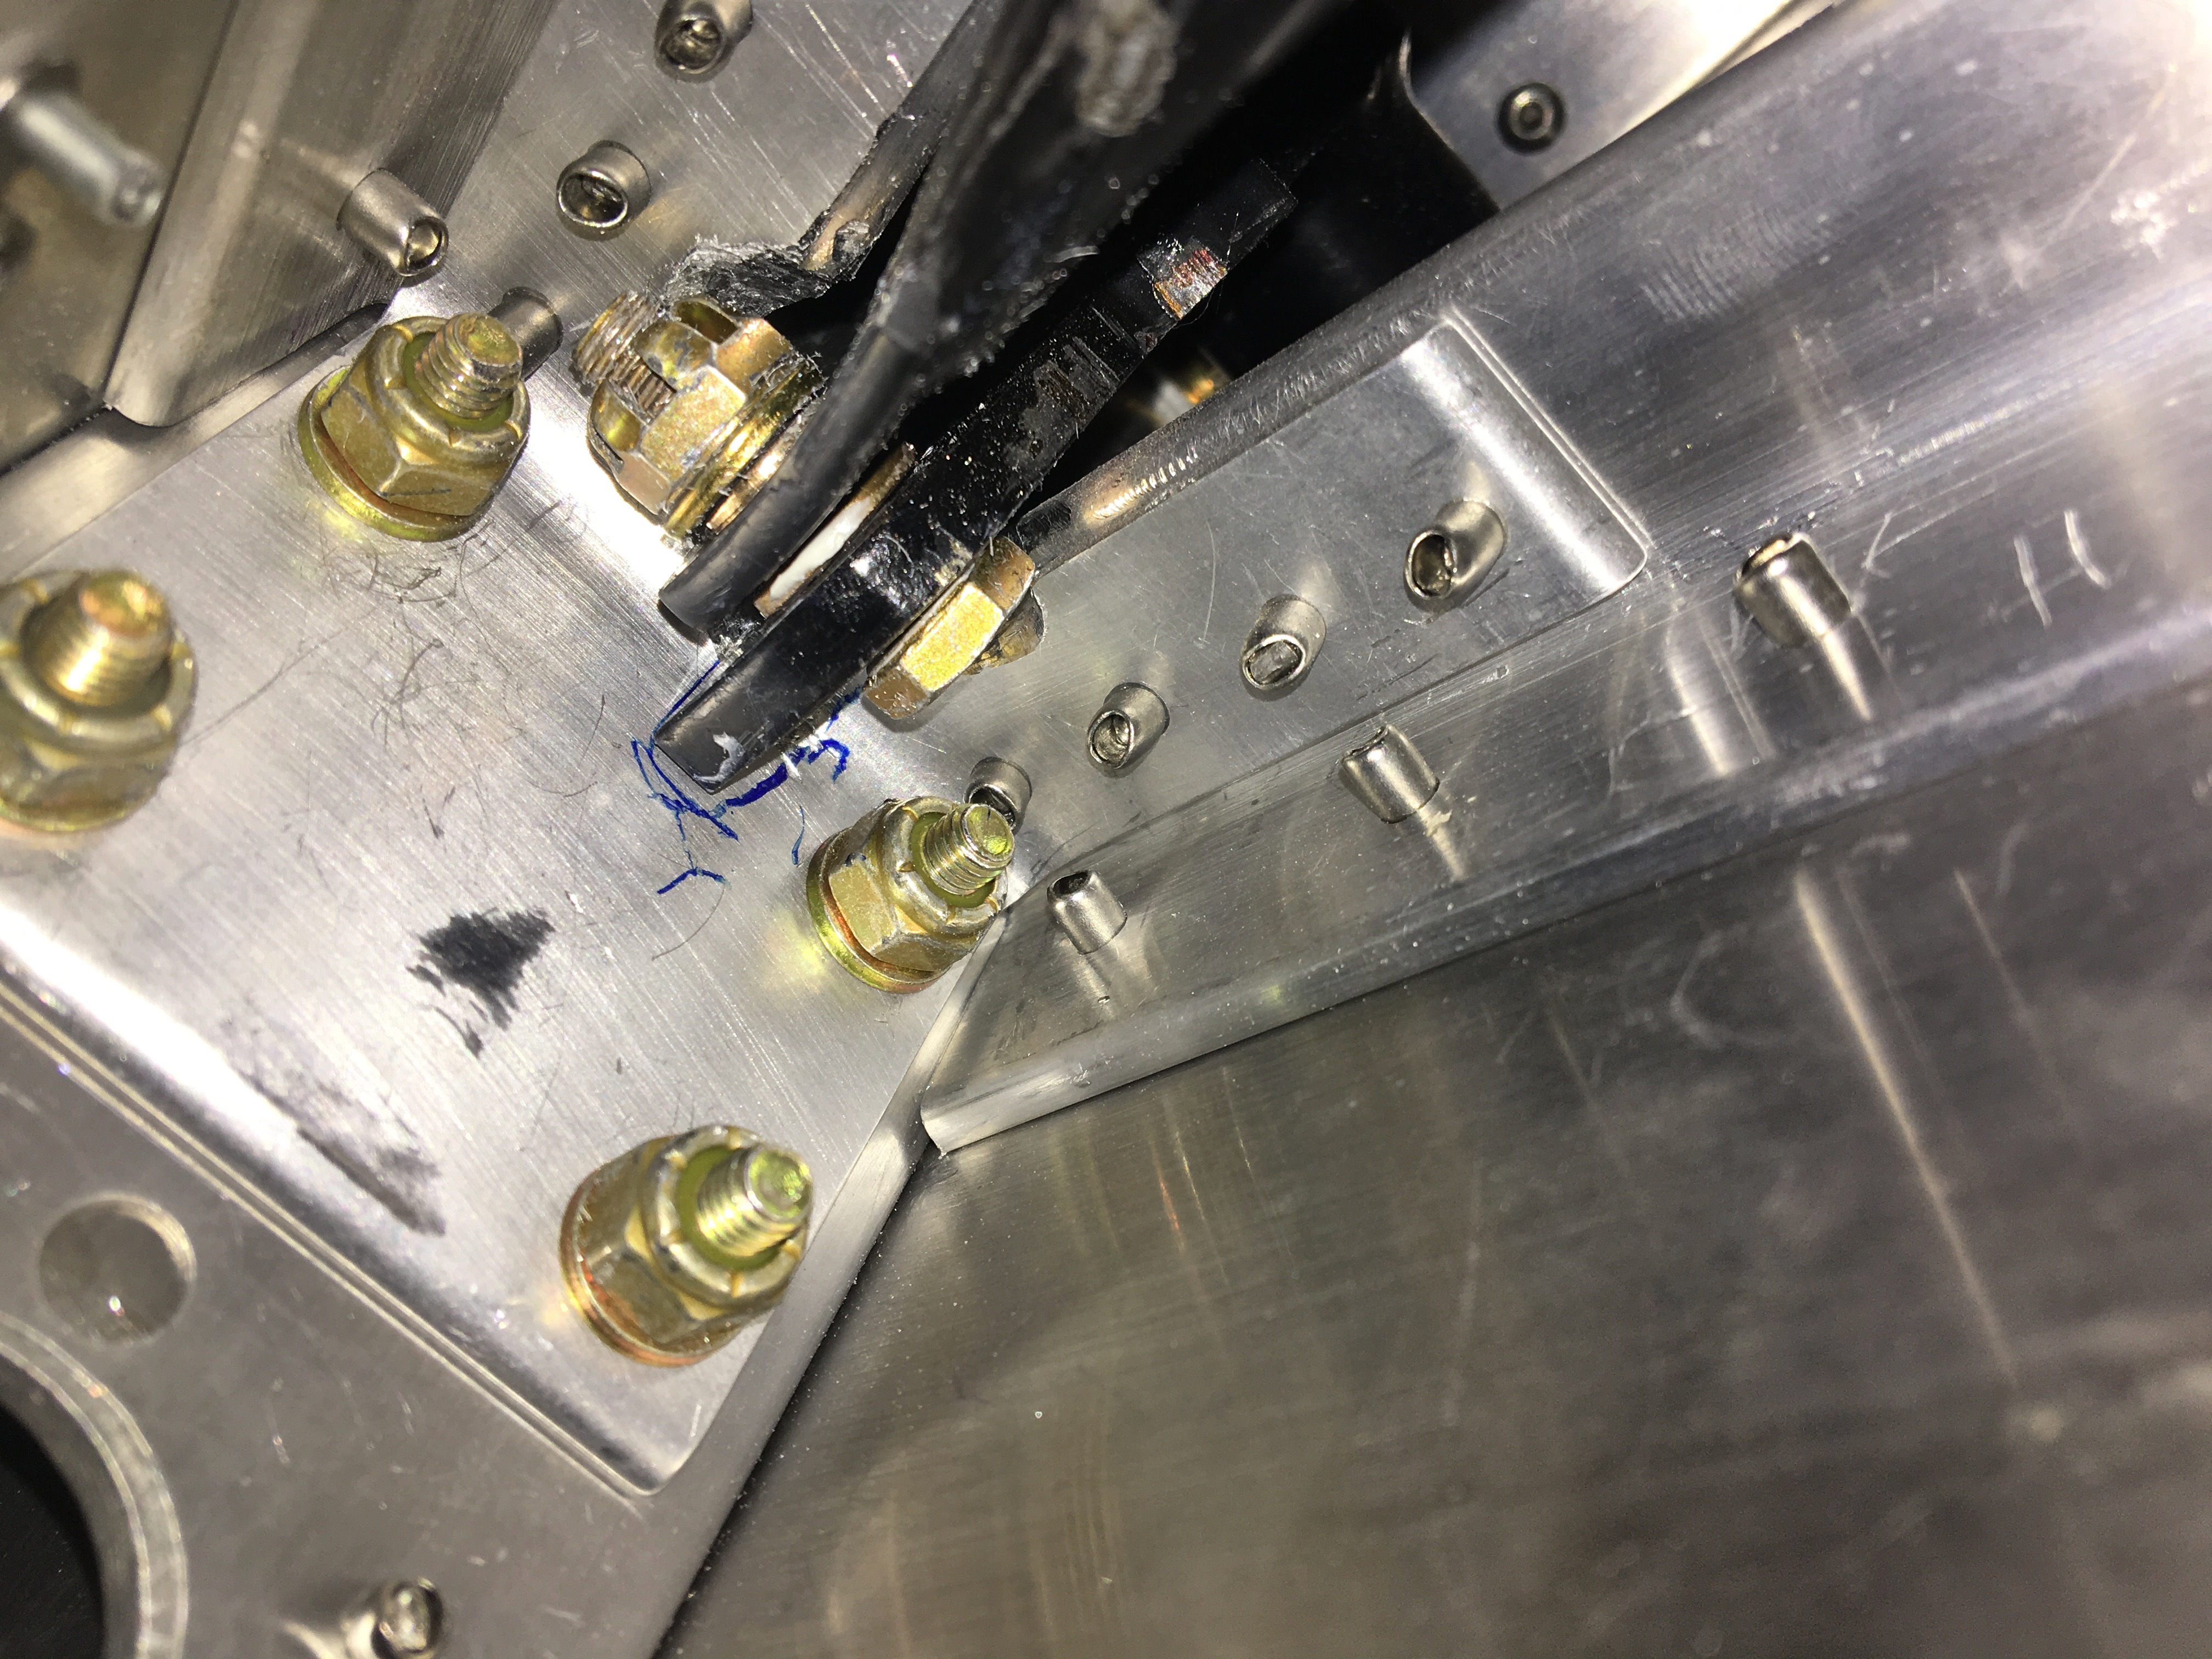
The front rod was short and easy to install. The rear one… well remember how I said the bulkhead holes for the rudder cable where in the wrong place? Well, not so. Those were actually for the elevator rod and the plans warn that they may need to be enlarged to accommodate full motion of the elevator. And boy did they. I spent hours and hours under the plane, filing these holes. The holes had to be widened just to get that 7” rod in place. I lost hope on making nice circles, or ovals, or capsule shaped holes. I would have had to remove too much material … I mean, how much of the bulk head can you take away before it loses structural integrity? So I tried to leave as much material as possible which led to some less than aesthetic shapes, all the while making round edges so as to minimize stress risers.
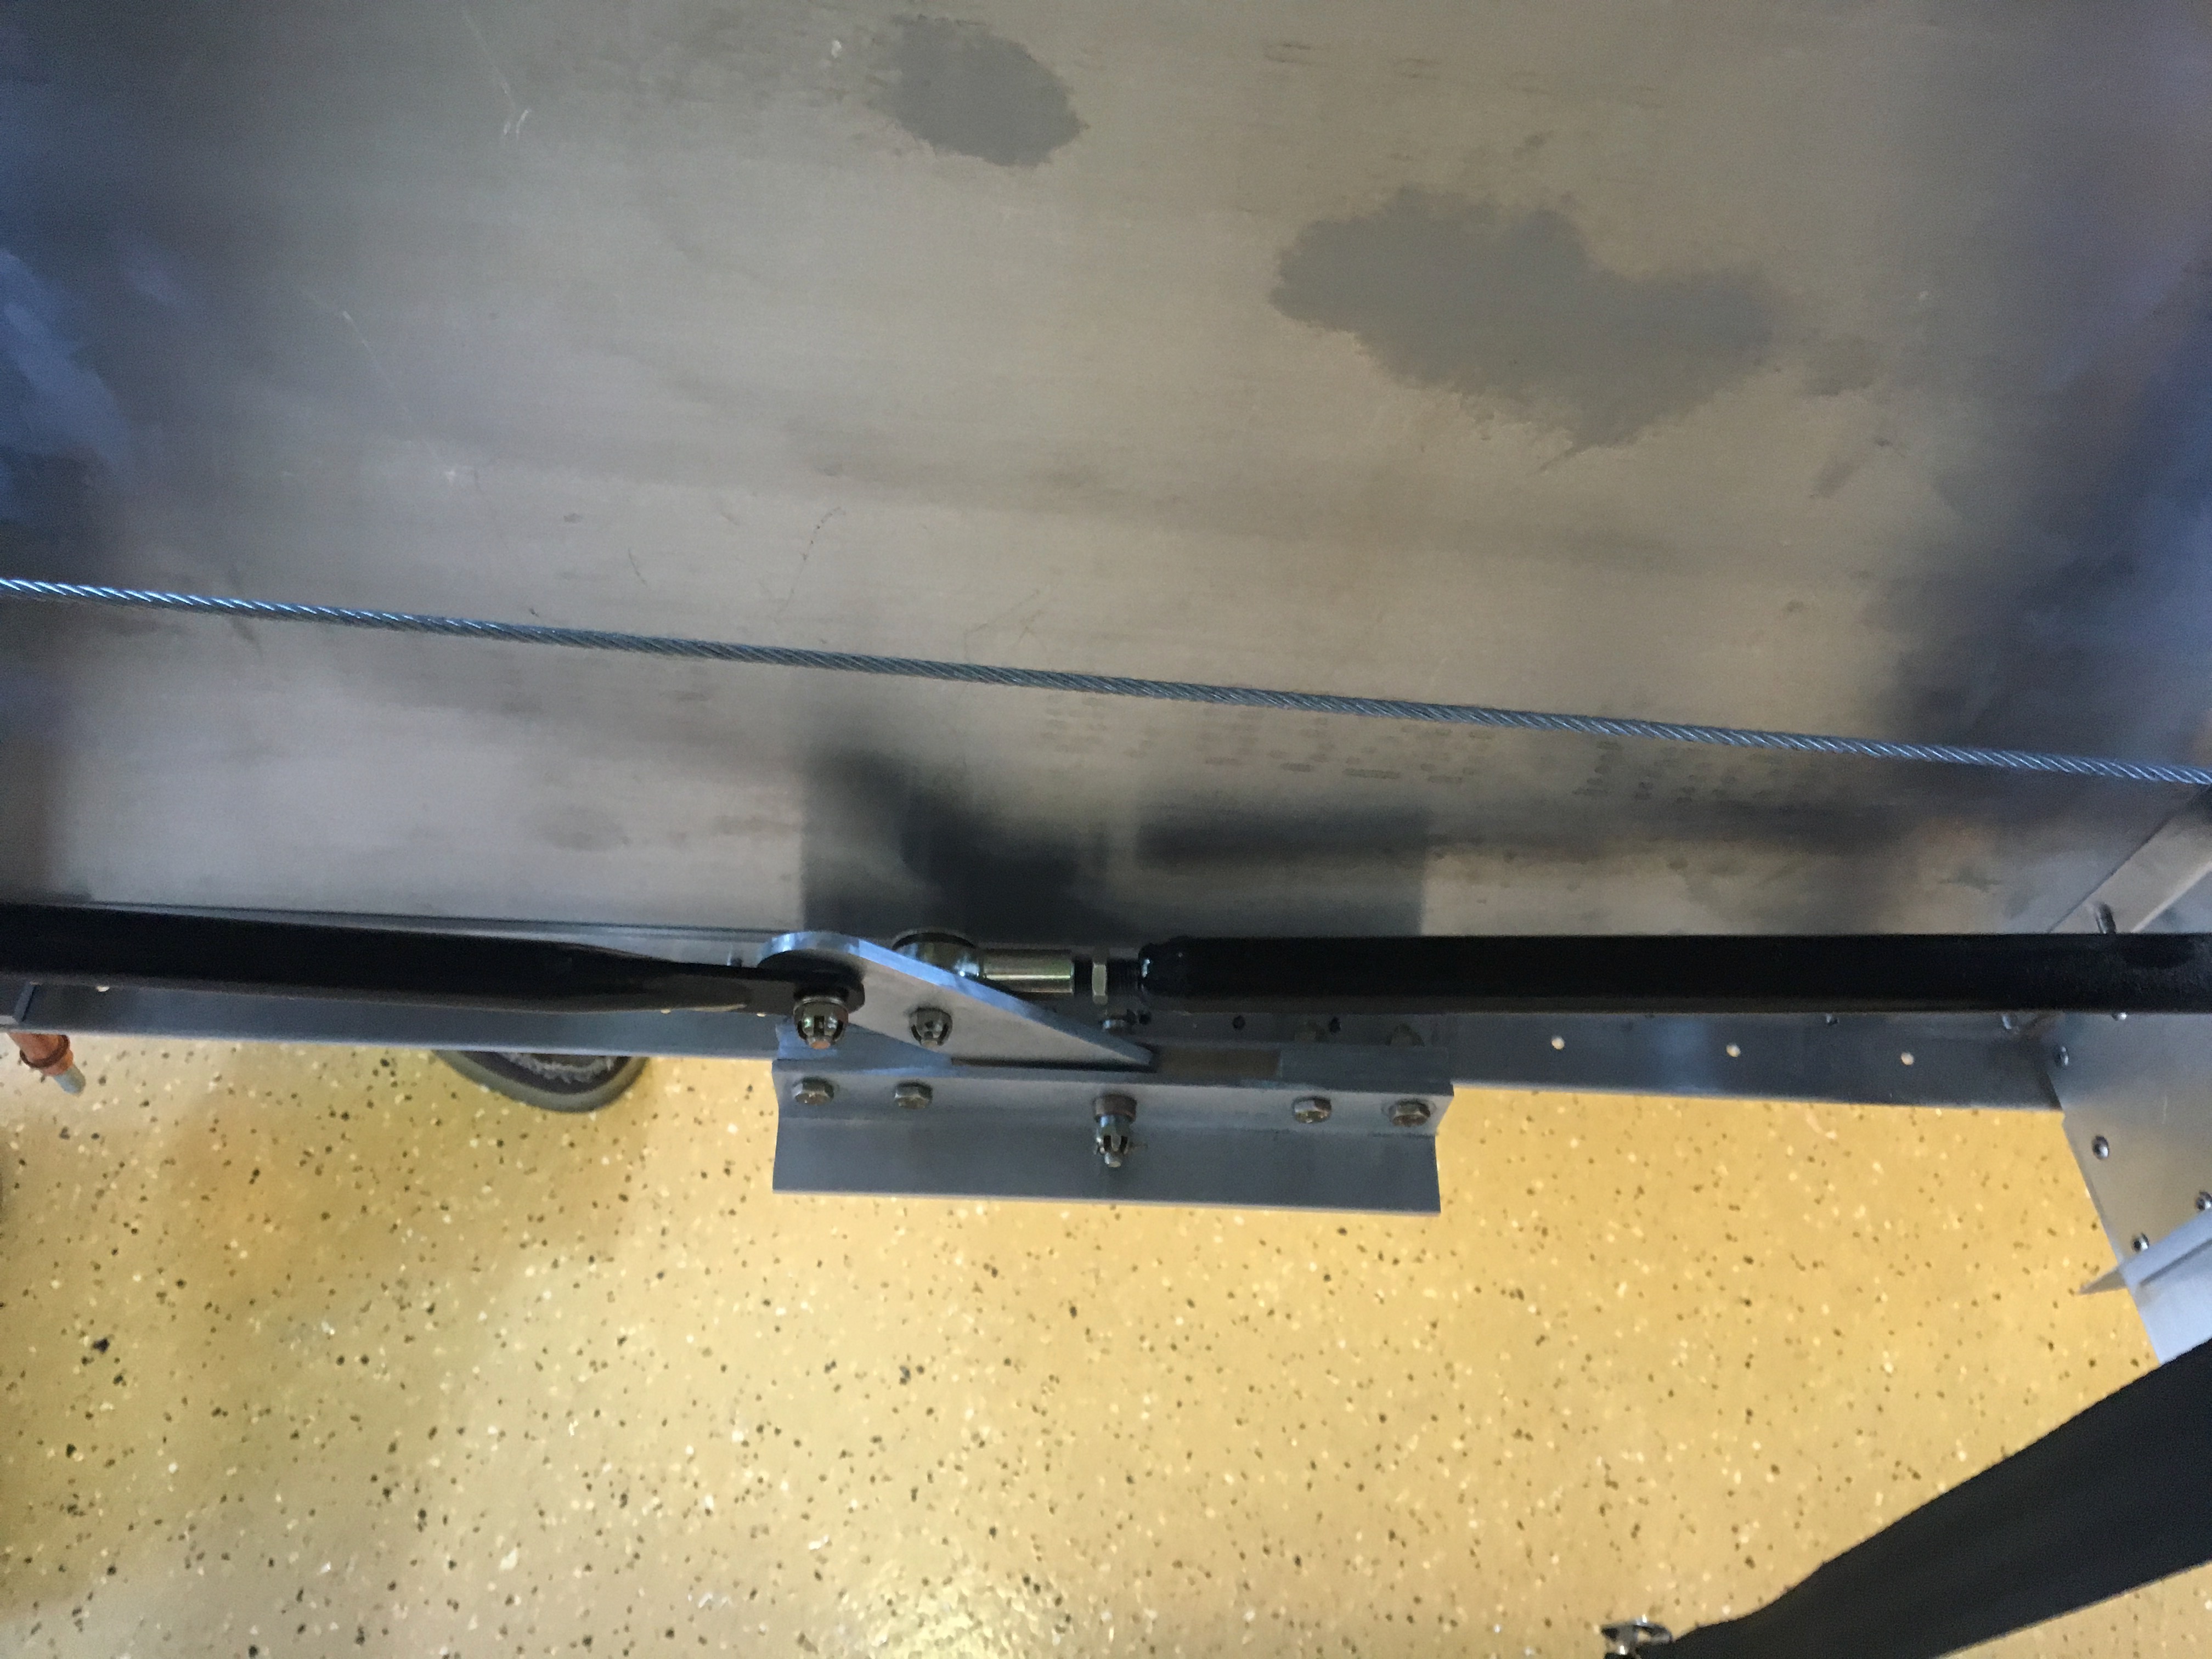
Of particular trouble was the aft fuselage where the control rod is bolted to the elevator horn. This area is super tight and very crowded. Even though I previously filed the area to get the elevator to go all the way to its stop, the bolt and nut for the connecting rod were now interfering. My battery powered dremel could get in there and trim away aluminum, but it’s a bit underpowered for metal work, and the battery drains quickly. So I resigned to purchase a corded dremel today and that sped things up.
This picture is taken from inside the fuselage looking up and back toward the elevator horn at its stop. Most of the ugly filed edges hidden here.
All that’s left to complete the elevator controls is to install the cotter pins in all the bolts/nuts.