eBike: Batteries
Goals
Speed
The key to speed with electric vehicles is voltage. The higher the voltage, the faster the motor can spin, for the most part. Although my BMS can handle 15 cells in series (54V), I found that 14 cells in series (50.4V) propels the bike plenty fast, faster than I’m comfortable going on a bicycle. As I mentioned before, 40+ mph is easily attainable. 50V is also a bit more manageable in terms of electrical components, so that’s the spec.
Acceleration / Range
Amps = Torque. The more current you can send to the motor, the more torque or acceleration you get. Each cell in parallel adds 10A in my case. Also, the more cells you have, the more Wh or range you get. No reason to skimp here. I wanted to fit as many cells as possible in the bike.
Learning
The electric plane will have lots of packs and a central control unit will be needed to coordinate their behavior. The networked design has to be proven. So for this bike, although it would be simpler to have a single pack, two packs are used in parallel to tackle this next advancement.
Encapsulation
The batteries have to be a “part” of the bike. In the first version I just plopped the batteries in the saddle bags. Cargo capacity was limited, wires were in the way, and I had to be careful not to put metal objects in the bags else I might short the cells. The center triangle of the bike frame seems the ideal place to put the cells.
Design
How many cells could I get in there? To answer this I modeled the bike in Fusion 360. Getting precise measurements of all the curves was a challenge. By cutting foam board until it fit snugly in the frame without gaps allowed me to draw a grid and translate it into CAD.
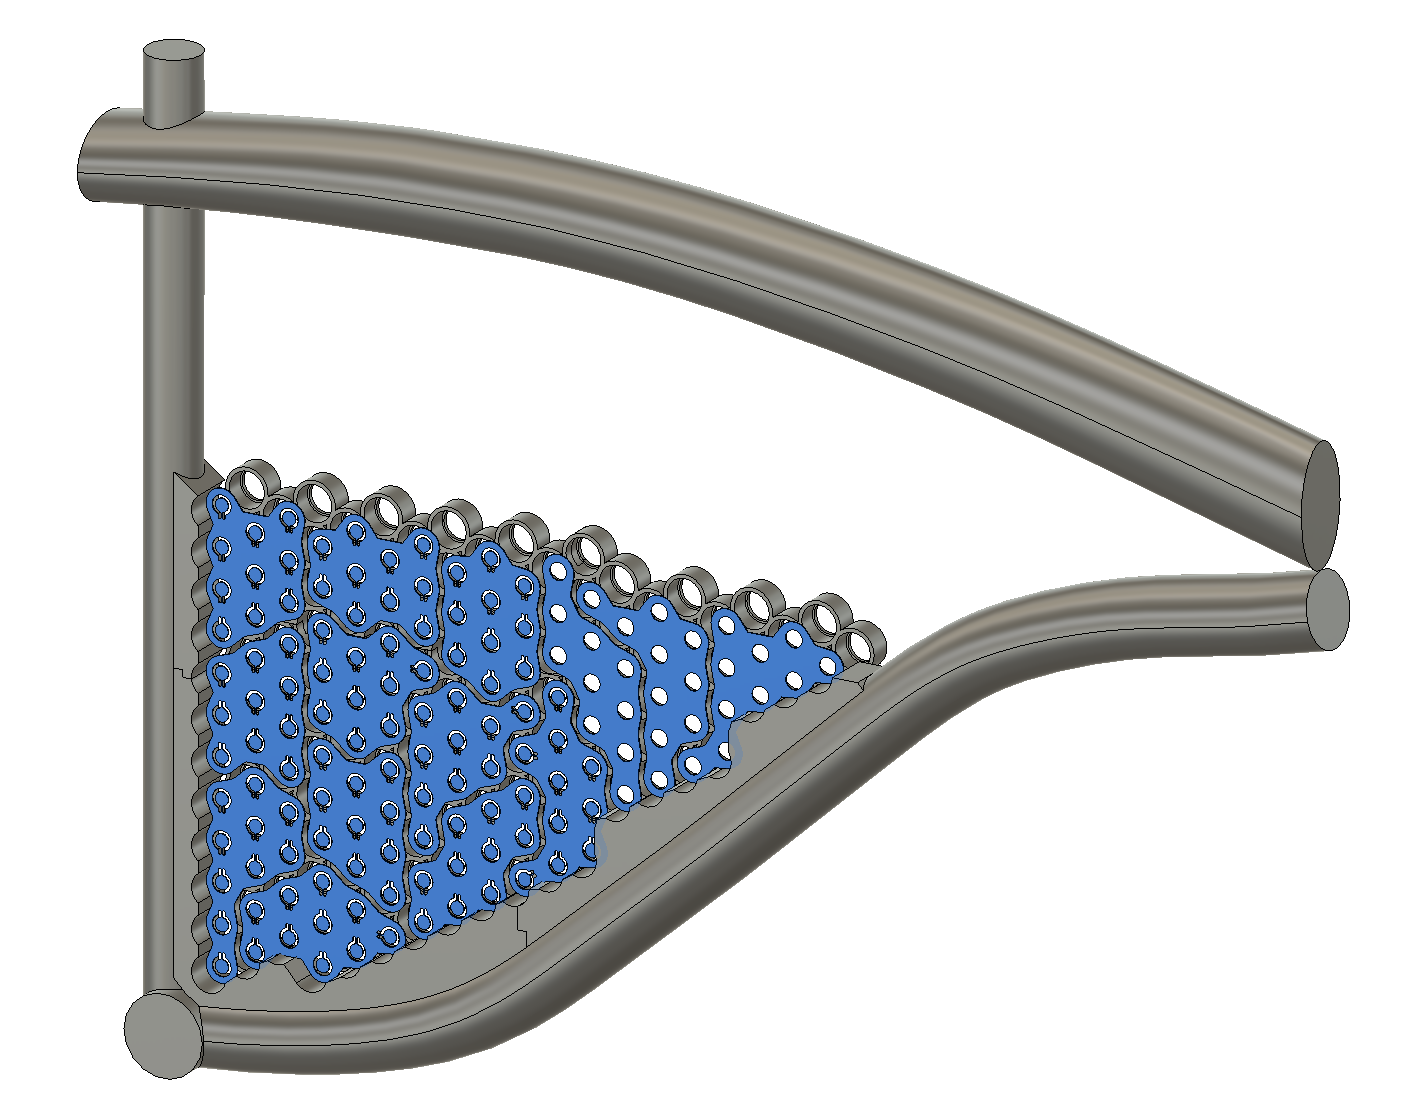
Note a few things:
- The cells are nestled right in the curvature of the frame to make best use of space.
- They are position as low as possible. The cells are heavy. The low position keeps the center of mass low increasing stability.
- The cell caps get 3D printed. They hold the cells firmly in place.
- Bus bars are designed to connect the cells in the desired series/parallel configuration.
- Although all the cells are cased together, the bus bars are designed to connect the cells into two isolated groups.
So how may cells? Above we already determined that we’ll use 14 in series, and that there will be two packs. So the total cell count has to be some multiple of 28. It turns out that 140 cells is the most that would fit. Two packs: 14s5p.
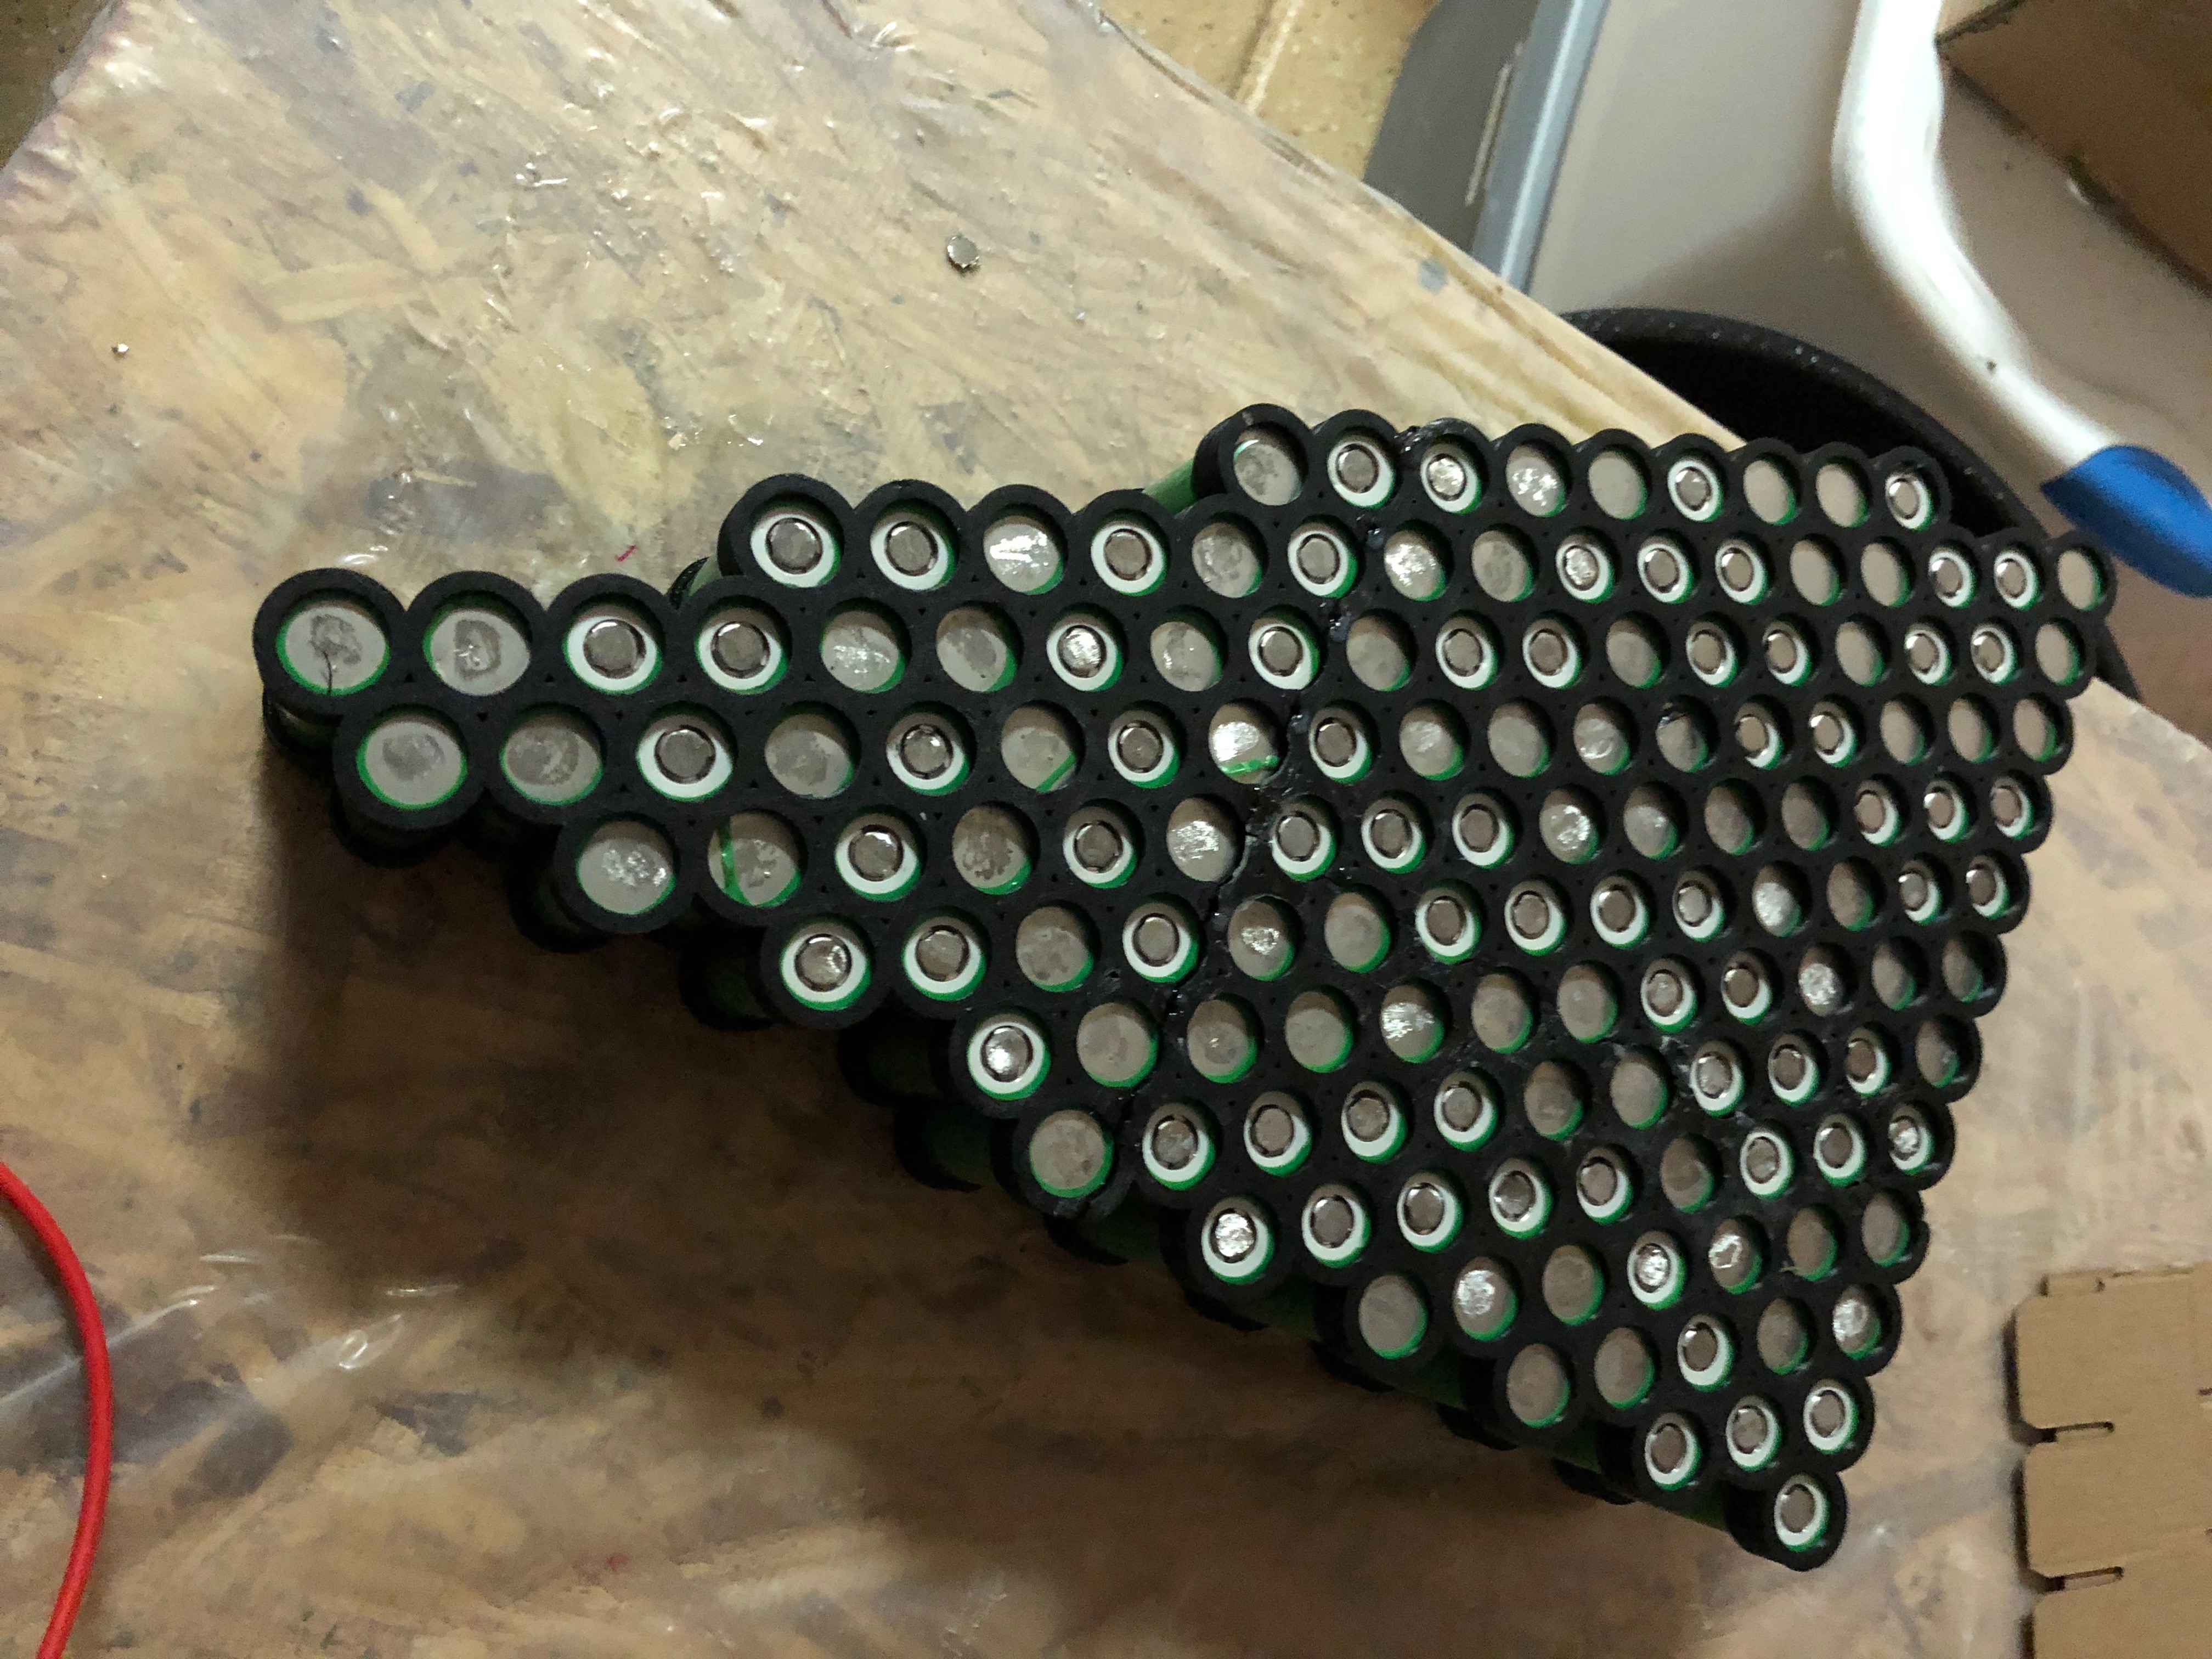
3D Printed Caps and Case
How did I live without a 3D printer before? What a useful tool!
Here you can see the caps all printed and loaded with cells. My printer had to manufacture them in three parts and then I glued them together.
Most of the cells were rescued from the pack that fell off Justin’s scooter, hence the scratch marks from removing the previous welds.
Bus Bars
In the previous post we learned that copper, although an excellent conductor, is not ideal for bus bars. I managed to find a supplier of pure nickel sheet metal. It’s pricey!
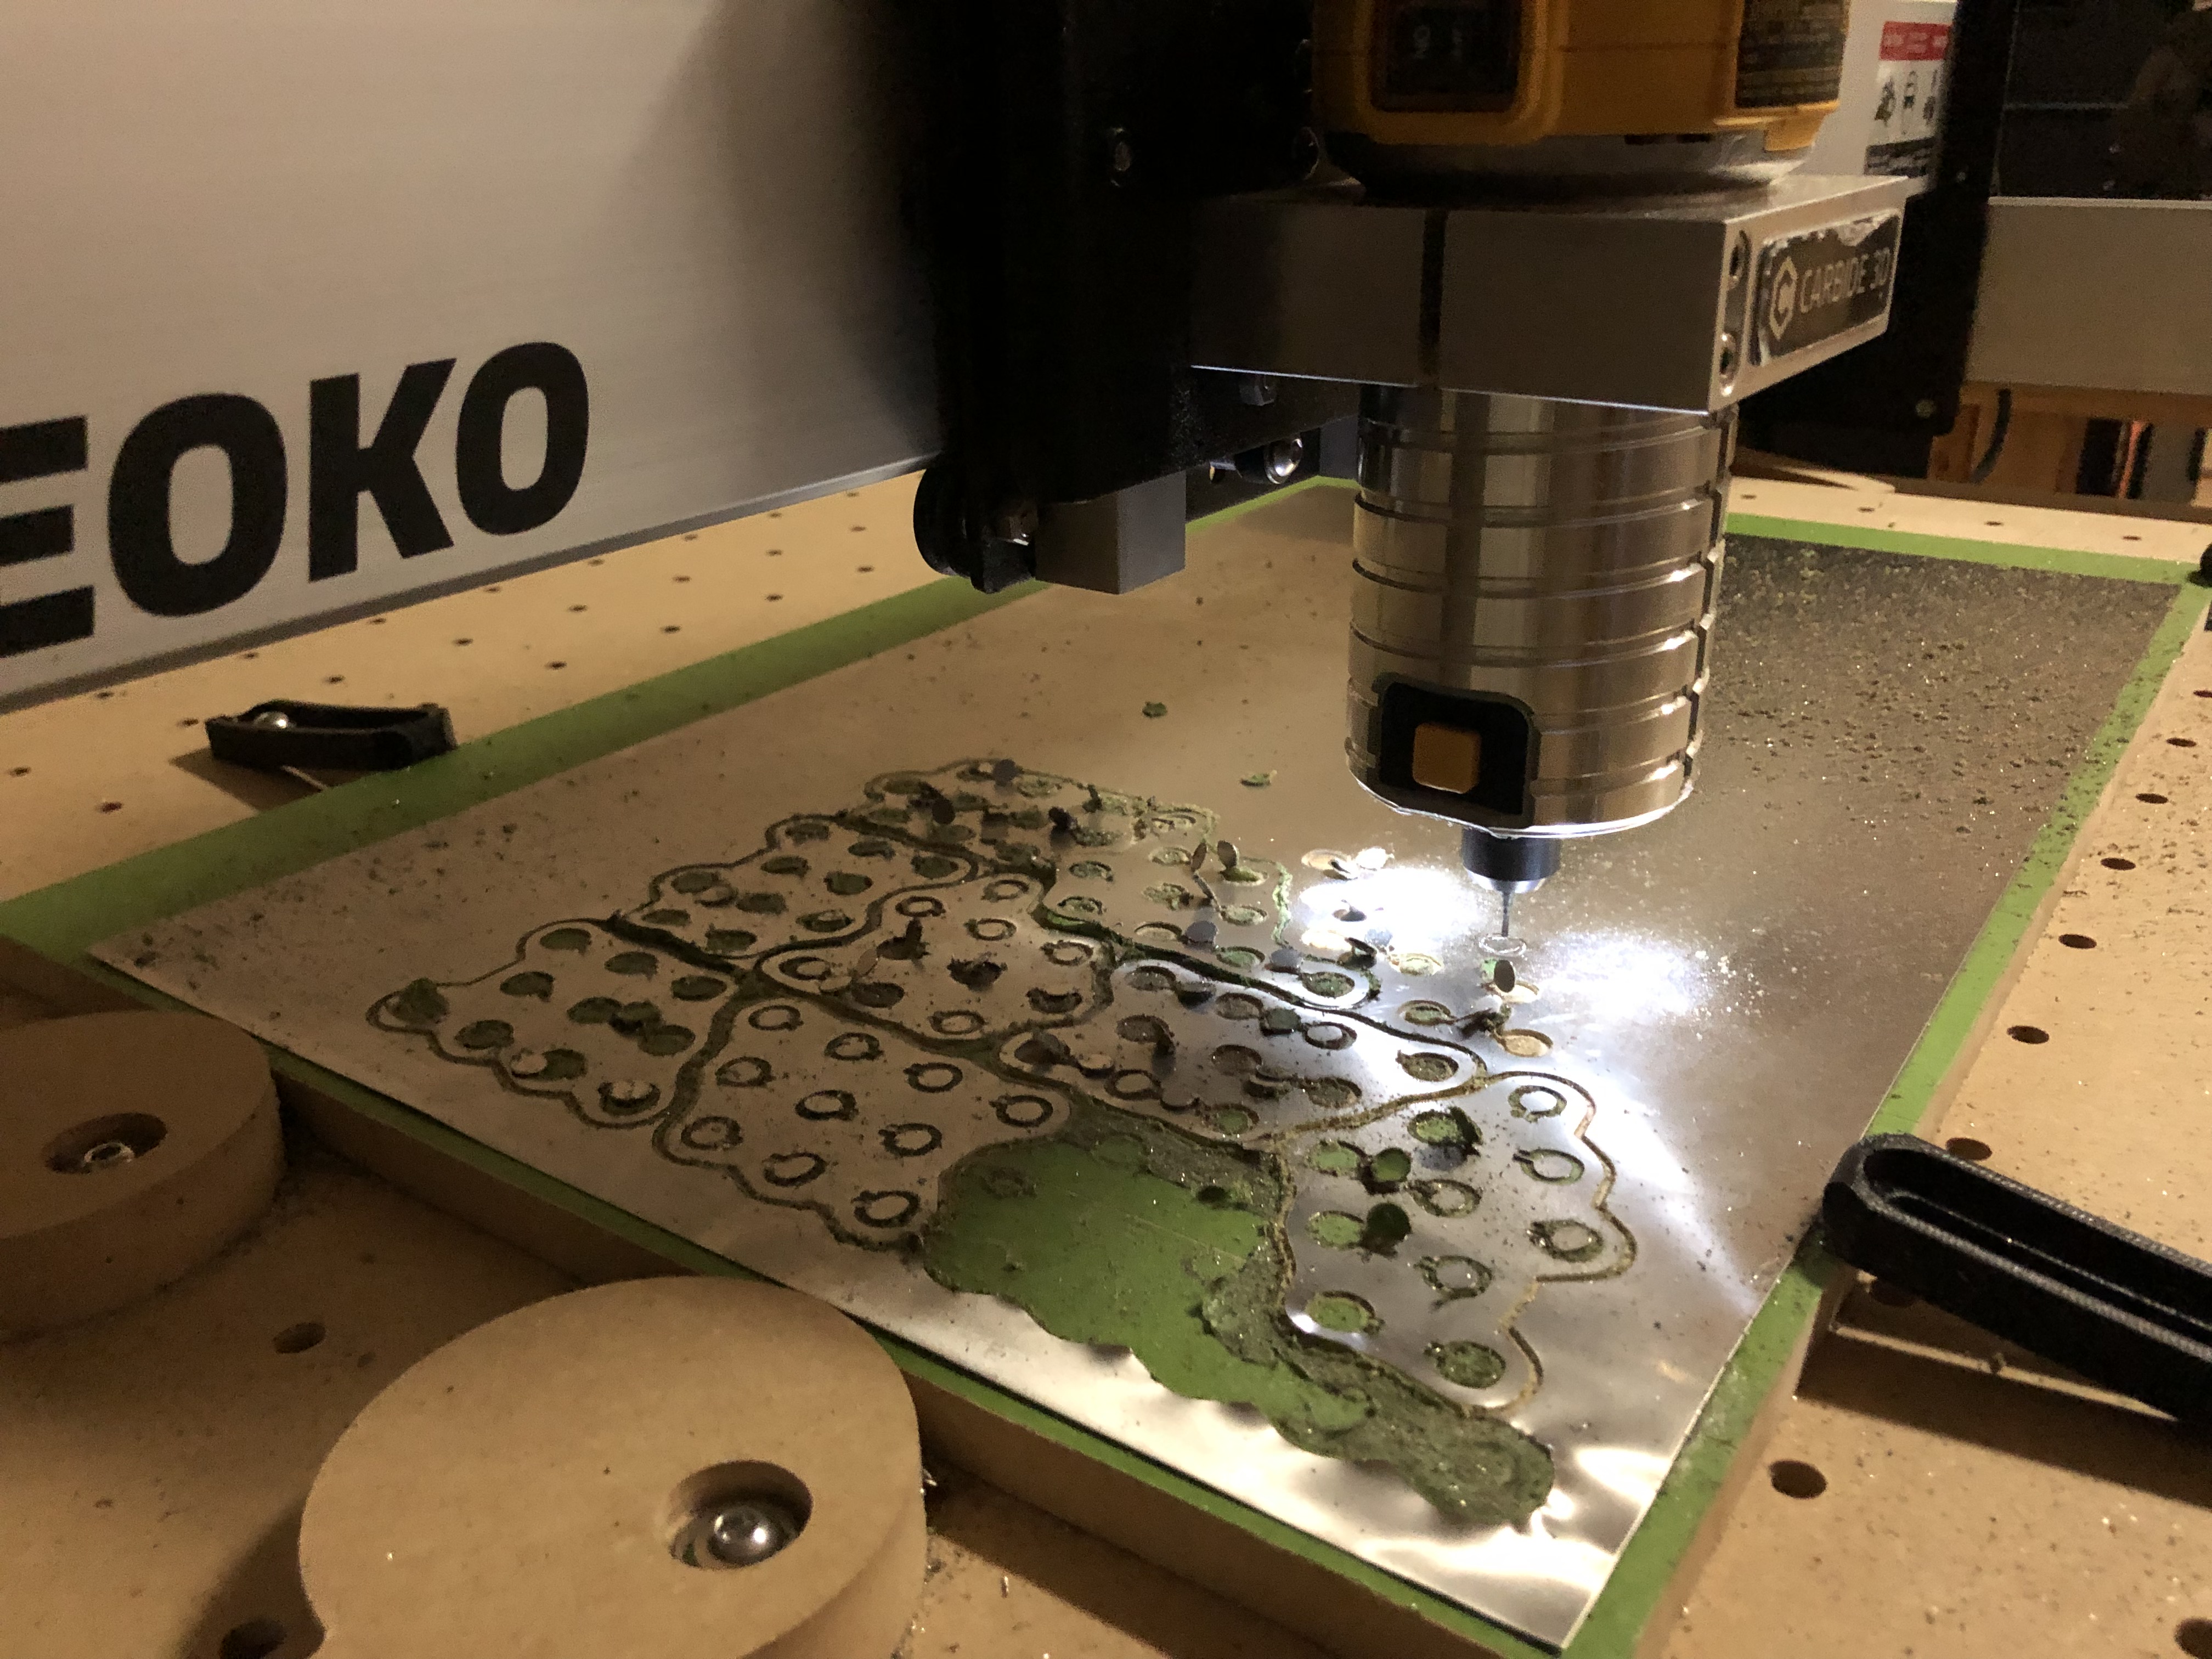
How do I cut the nickel into bus bars? The machine shop wants one week to cut parts with their laser cutter. The cost in time, money, and inconvenience is just too high. I needed a solution where I could do fast prototyping and cut the parts on my own. Carbon laser CNCs are affordable but they can’t cut metal. Fiber laser CNCs cost $500k and are the size of a small bus. So I researched CNC routers and decided to get a Shapeoko. These are fun!
There’s a learning curve to CNC routers and it took me several attempts to get my bus bars cut properly. It actually took a couple days of CNC-ing to get a complete set (30 pieces) cut. If I had to do it again, I think it’d take maybe half a day knowing what I know now.
Cell Level Fuses
The fallen pack from Justin’s scooter was good motivation to figure out cell-level fuses. The principle here is that cells need protecting. Not only will cell-level fuses protect the cells from overcurrent, but if a single cell shorts, it’s fuse will blow and it’s peers will not be drained. Since my cells are rated for 10A, I wanted fuses that would blow just above 10A, like maybe 15A.
Originally, I designed the fuses into my bus bars as 0.5mm legs holding onto a tab that would be welded to the cells. However, the CNC router is a bit brutish and would rip that skinny legs out of position or cut them off entirely. Turns out it wouldn’t have worked anyway.
The 0.5mm leg width was based off calculations of nickel ampacity and some preliminary testing. Further testing demonstrated that, although the nickle does indeed glow red hot with 15A of current, it just doesn’t melt! Even if I increase current to 25A, it just glows hotter. The connection remains and current continues to flow. I redesigned the bus bars without the fuses.
Based off tips from various Youtubers, I decided to try out resistor leads; the wire-ends on through-hole resistors. It worked! 10A: nothing. 15A: they glow and melt. Perfect! Now, the thought of wasting resistors bugged me, so I figured out what about these wires make them work. Turns out it’s the steel-plated solid copper wire. Steel is a poor conductor (relatively) and it get’s hot enough to melt.
I went online to buy a spool of this wire, but I guess it’s not all that common. 2 weeks for delivery was the best I could find. I ordered it but 2 weeks is too long to wait. Good thing I have a LOT of resistors!
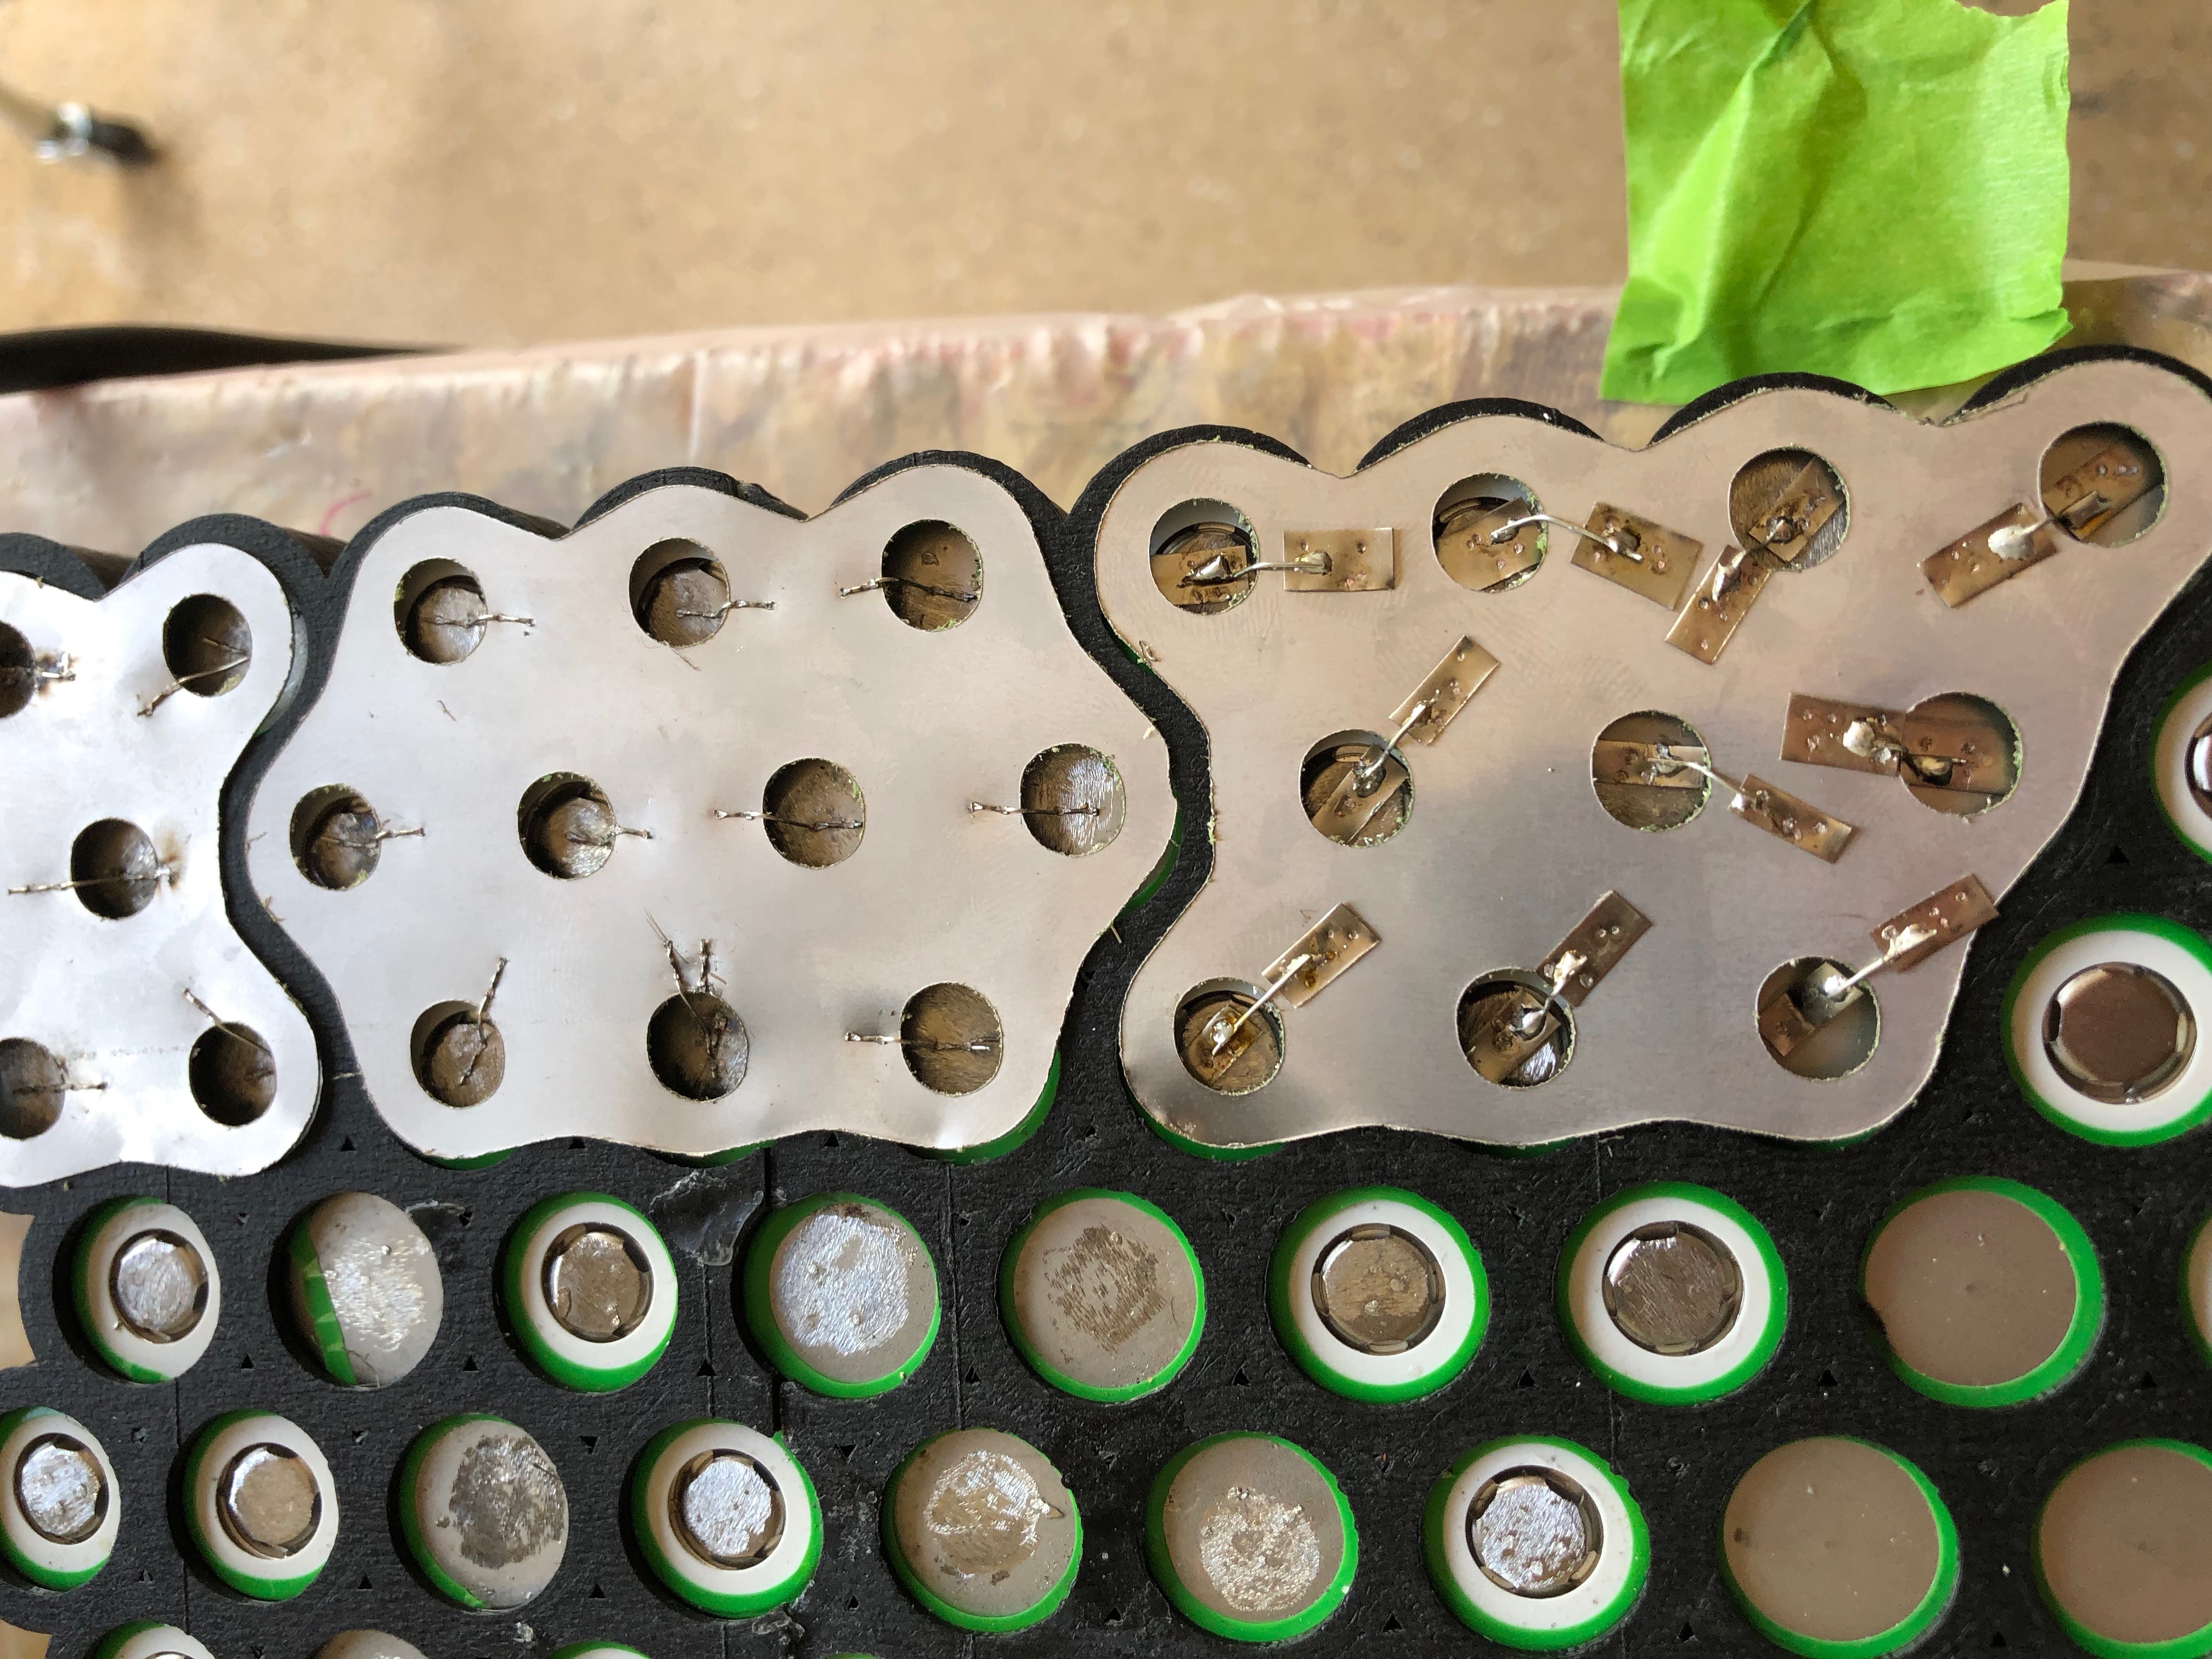
Welding those skinny wires to the cells was messy. Even with some custom welding leads for the purpose, the little wires would flatten, kink, or even break sometimes. After welding a dozen or so cells, I switched strategy. By soldering the steel-plated wire across two nickel strips, the welding process was much more consistant.
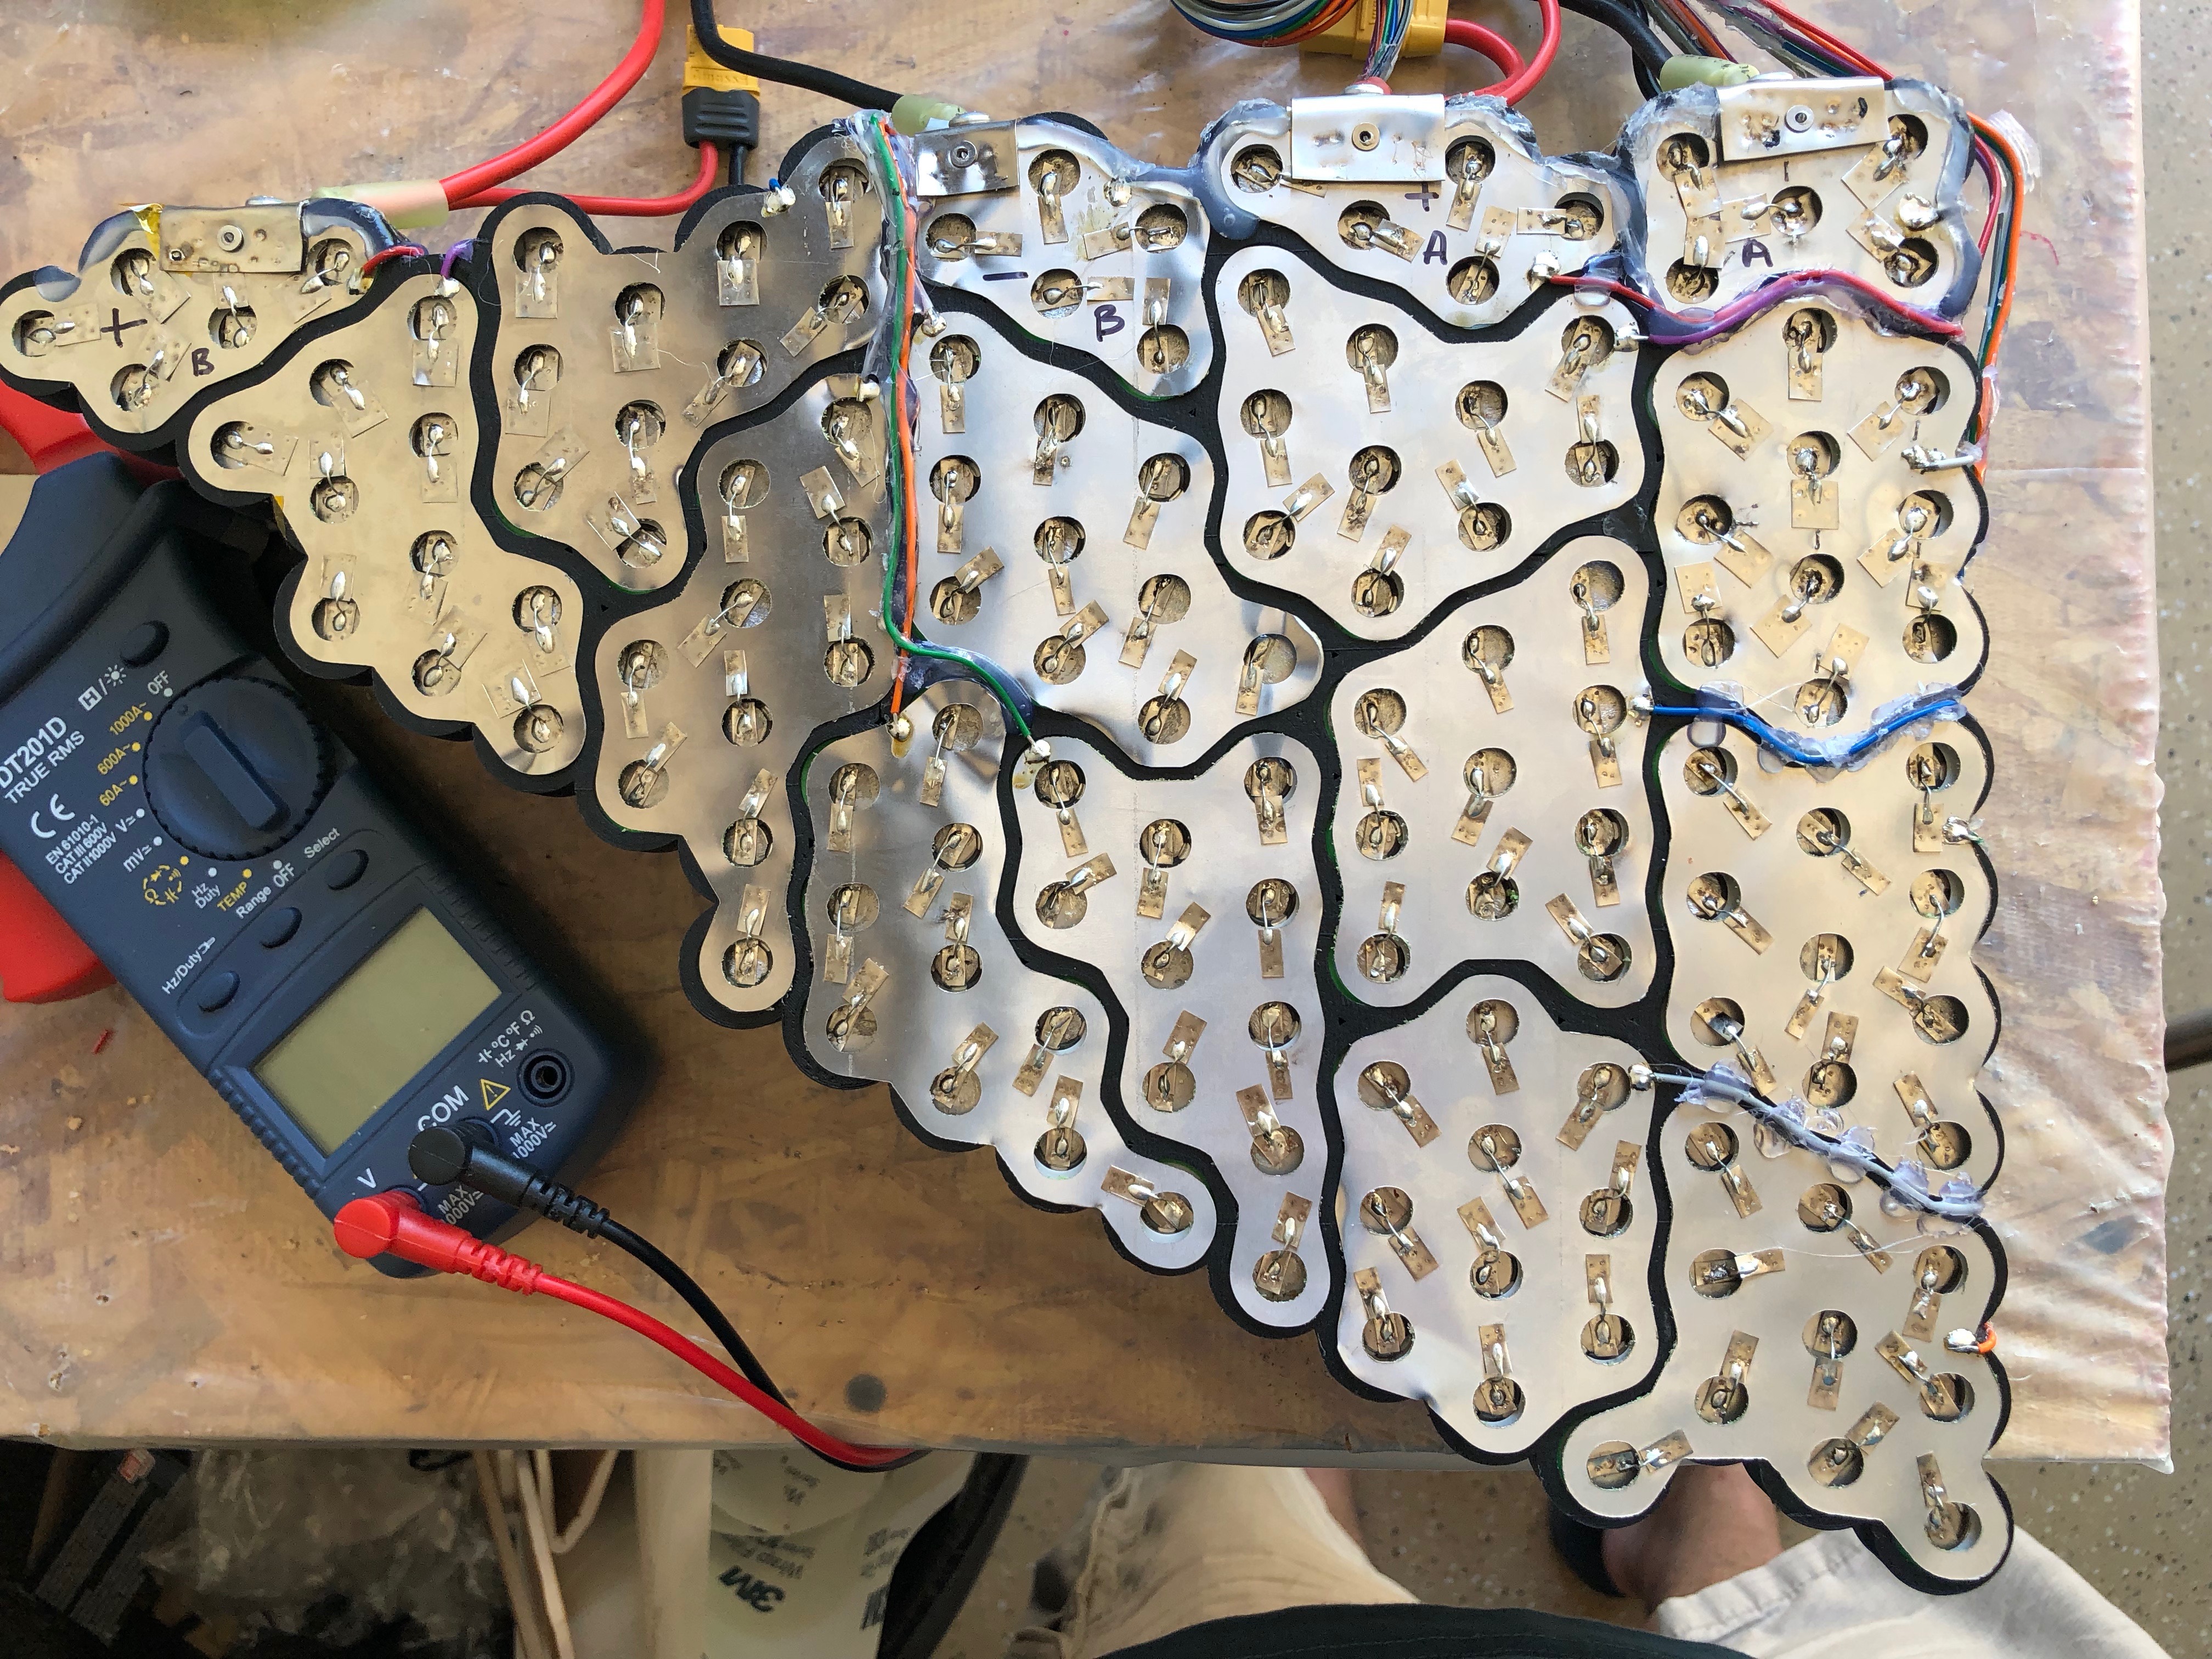
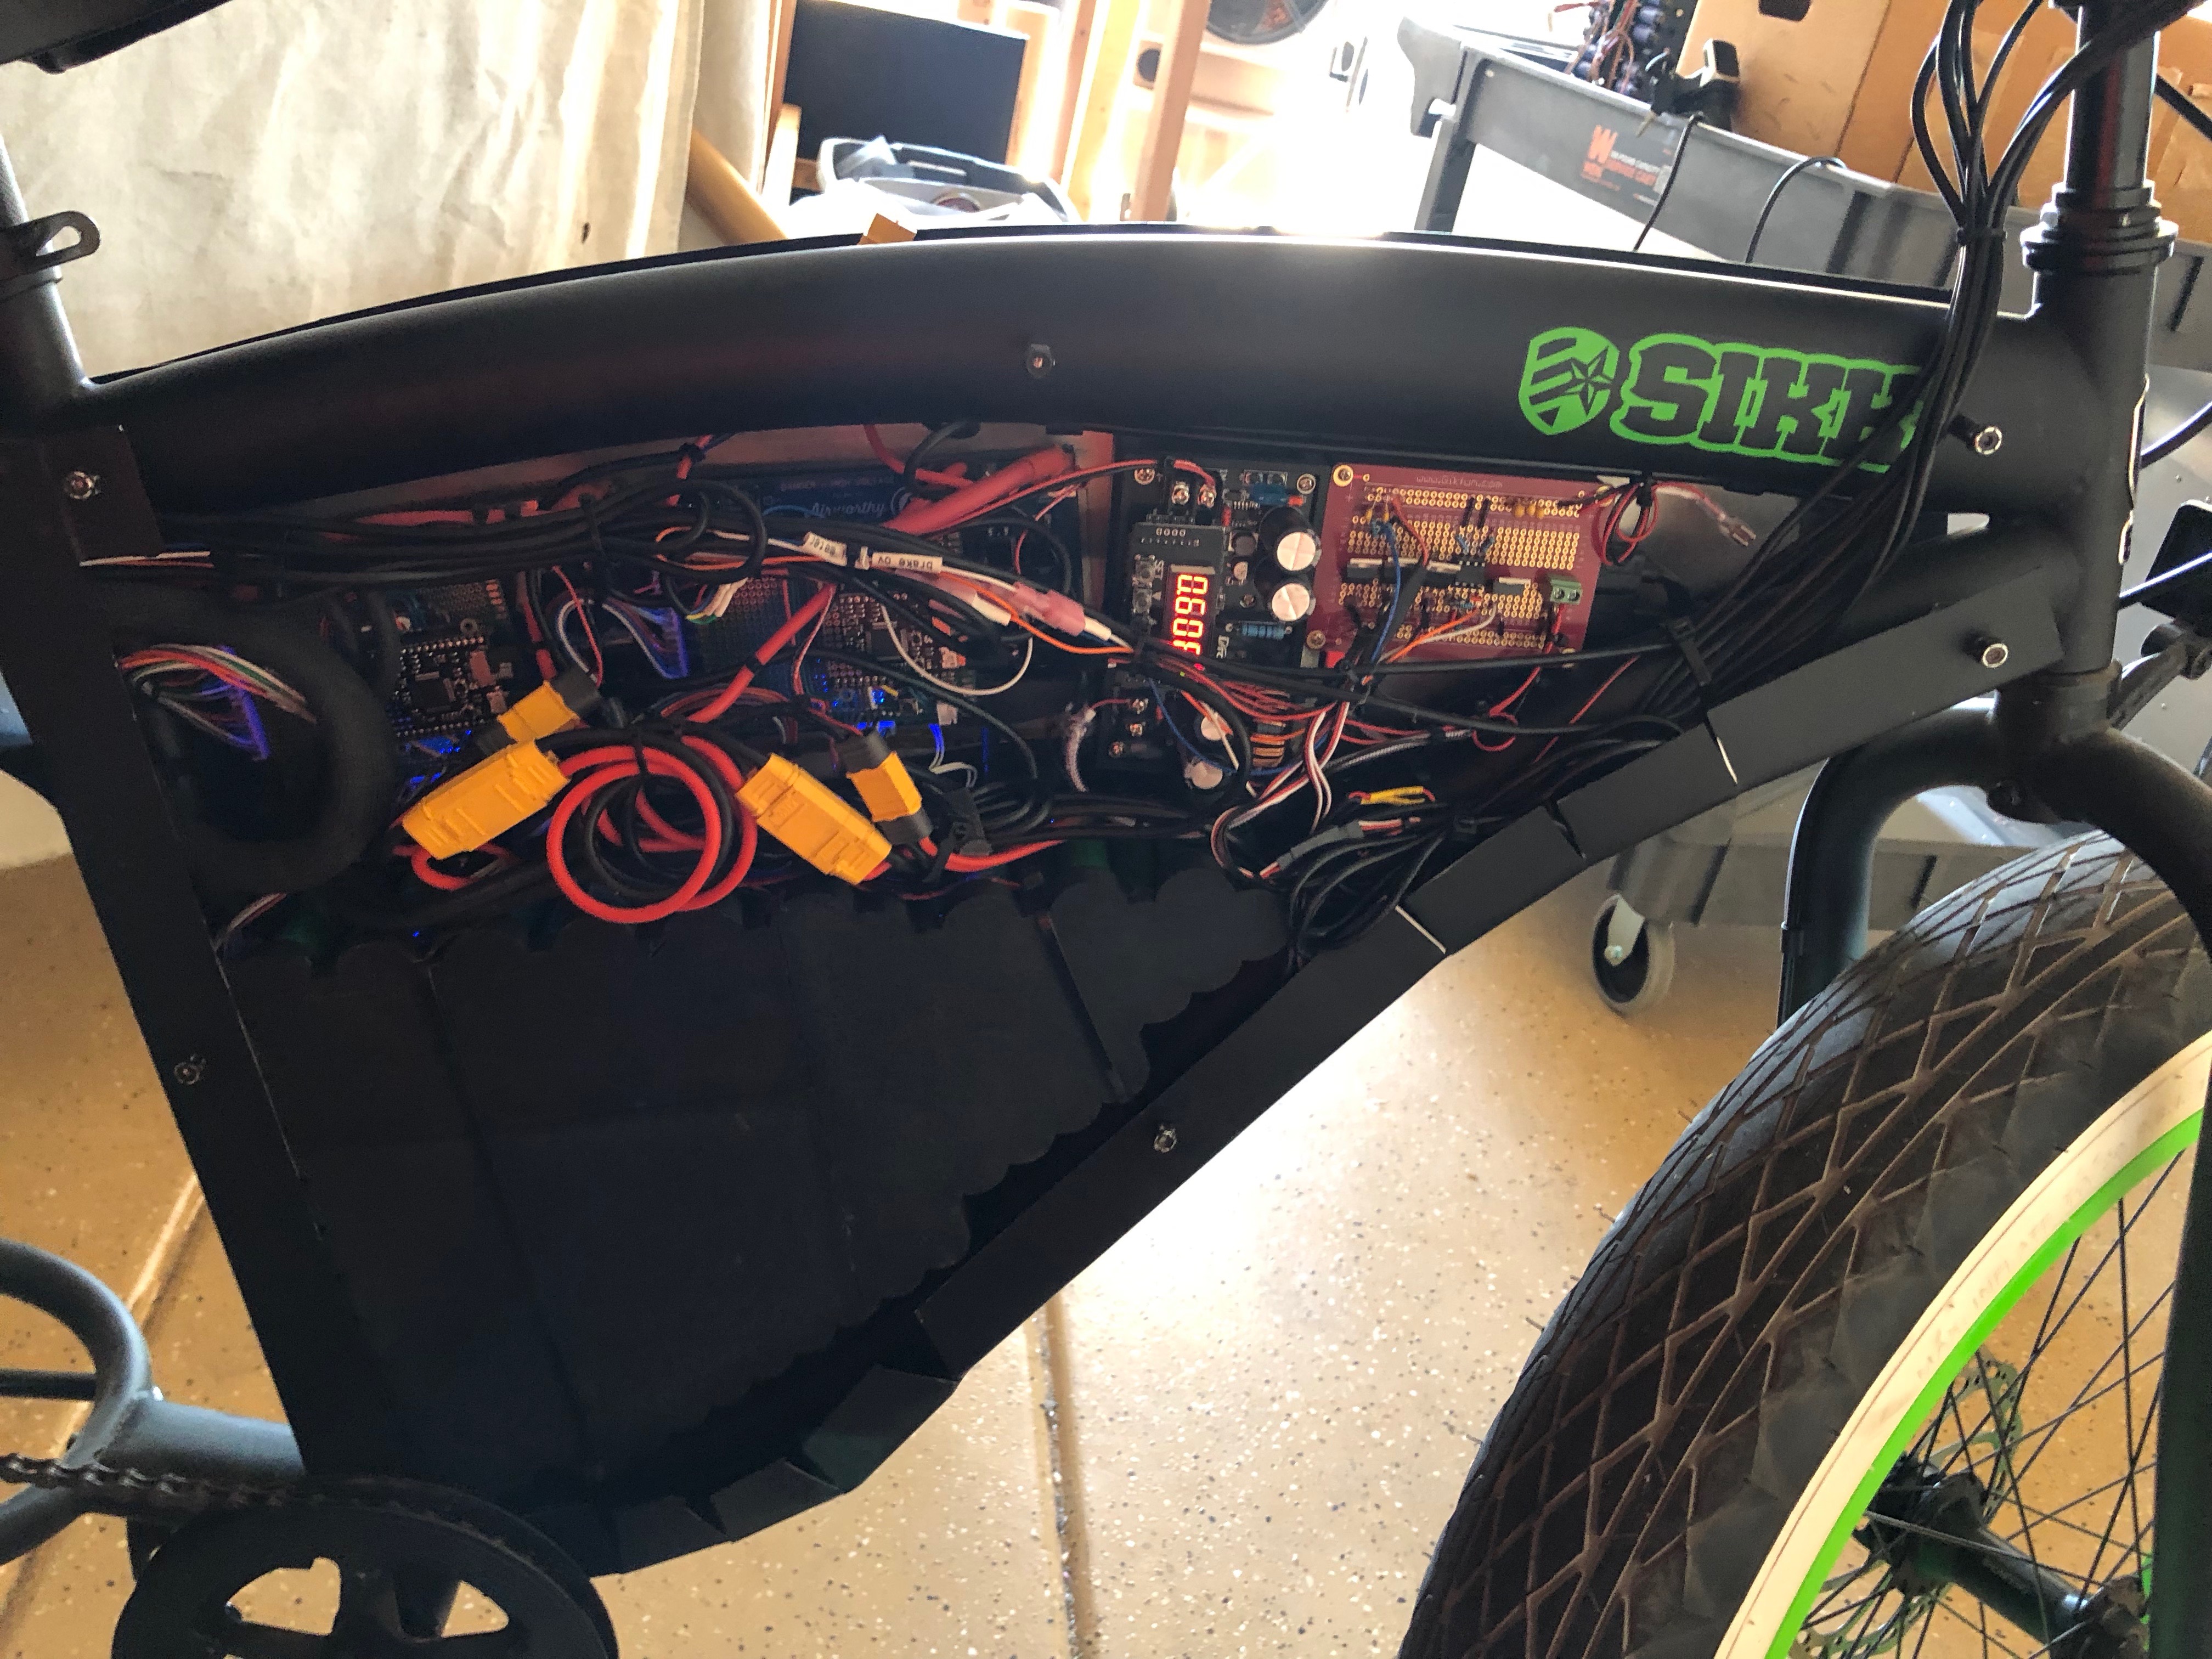
Completed Packs
You can see below that I added all the sense wires, riveted on terminal plates, added connectors, cased it up and installed it in the bike. It fits like a glove.
Not visible is the kapton tape to insulate the bus bars and foam sheet to pad the cells from bumps and impacts.
So far the packs work great. The first few fuses (without nickel tips) did blow at one point, which is probabaly a good thing, so I replaced them with the improved nickel tipped version.
All-in-all, these are my best packs yet.