Main Gear
On to a task for which I have the parts: the main gear. Based on advise from fellow Sonex builders I upgraded the brakes to Sonex’s AeroConversion hydraulics. The first pic shows the intimidating amount of parts for the brakes. To my surprise, it all came together quite simply. So I attached the tires to the gear frame and then researched how to attach it all to the fusealge.
There are ten bolts that hold the gear onto the fuselage. However, that big chunk of aluminum used for the gears (the strut?) doesn’t have any pilot holes. And it’s all curvy, so how do you find the exact center? Well, I tried a few techniques.
1) First I laid a meter stick on top and marked the points where the flat top turned into a curve; where it seperated from the ruler. The results seemed questionable.
2) Second I got a string and measured from each end of the strut, bottom to bottom and over the top. Folding the string in half gave me center. This seemed accurate but I noticed the string had some stretch to it. I became worried that the the string’s elasticity would create an error. So I looked for another method.
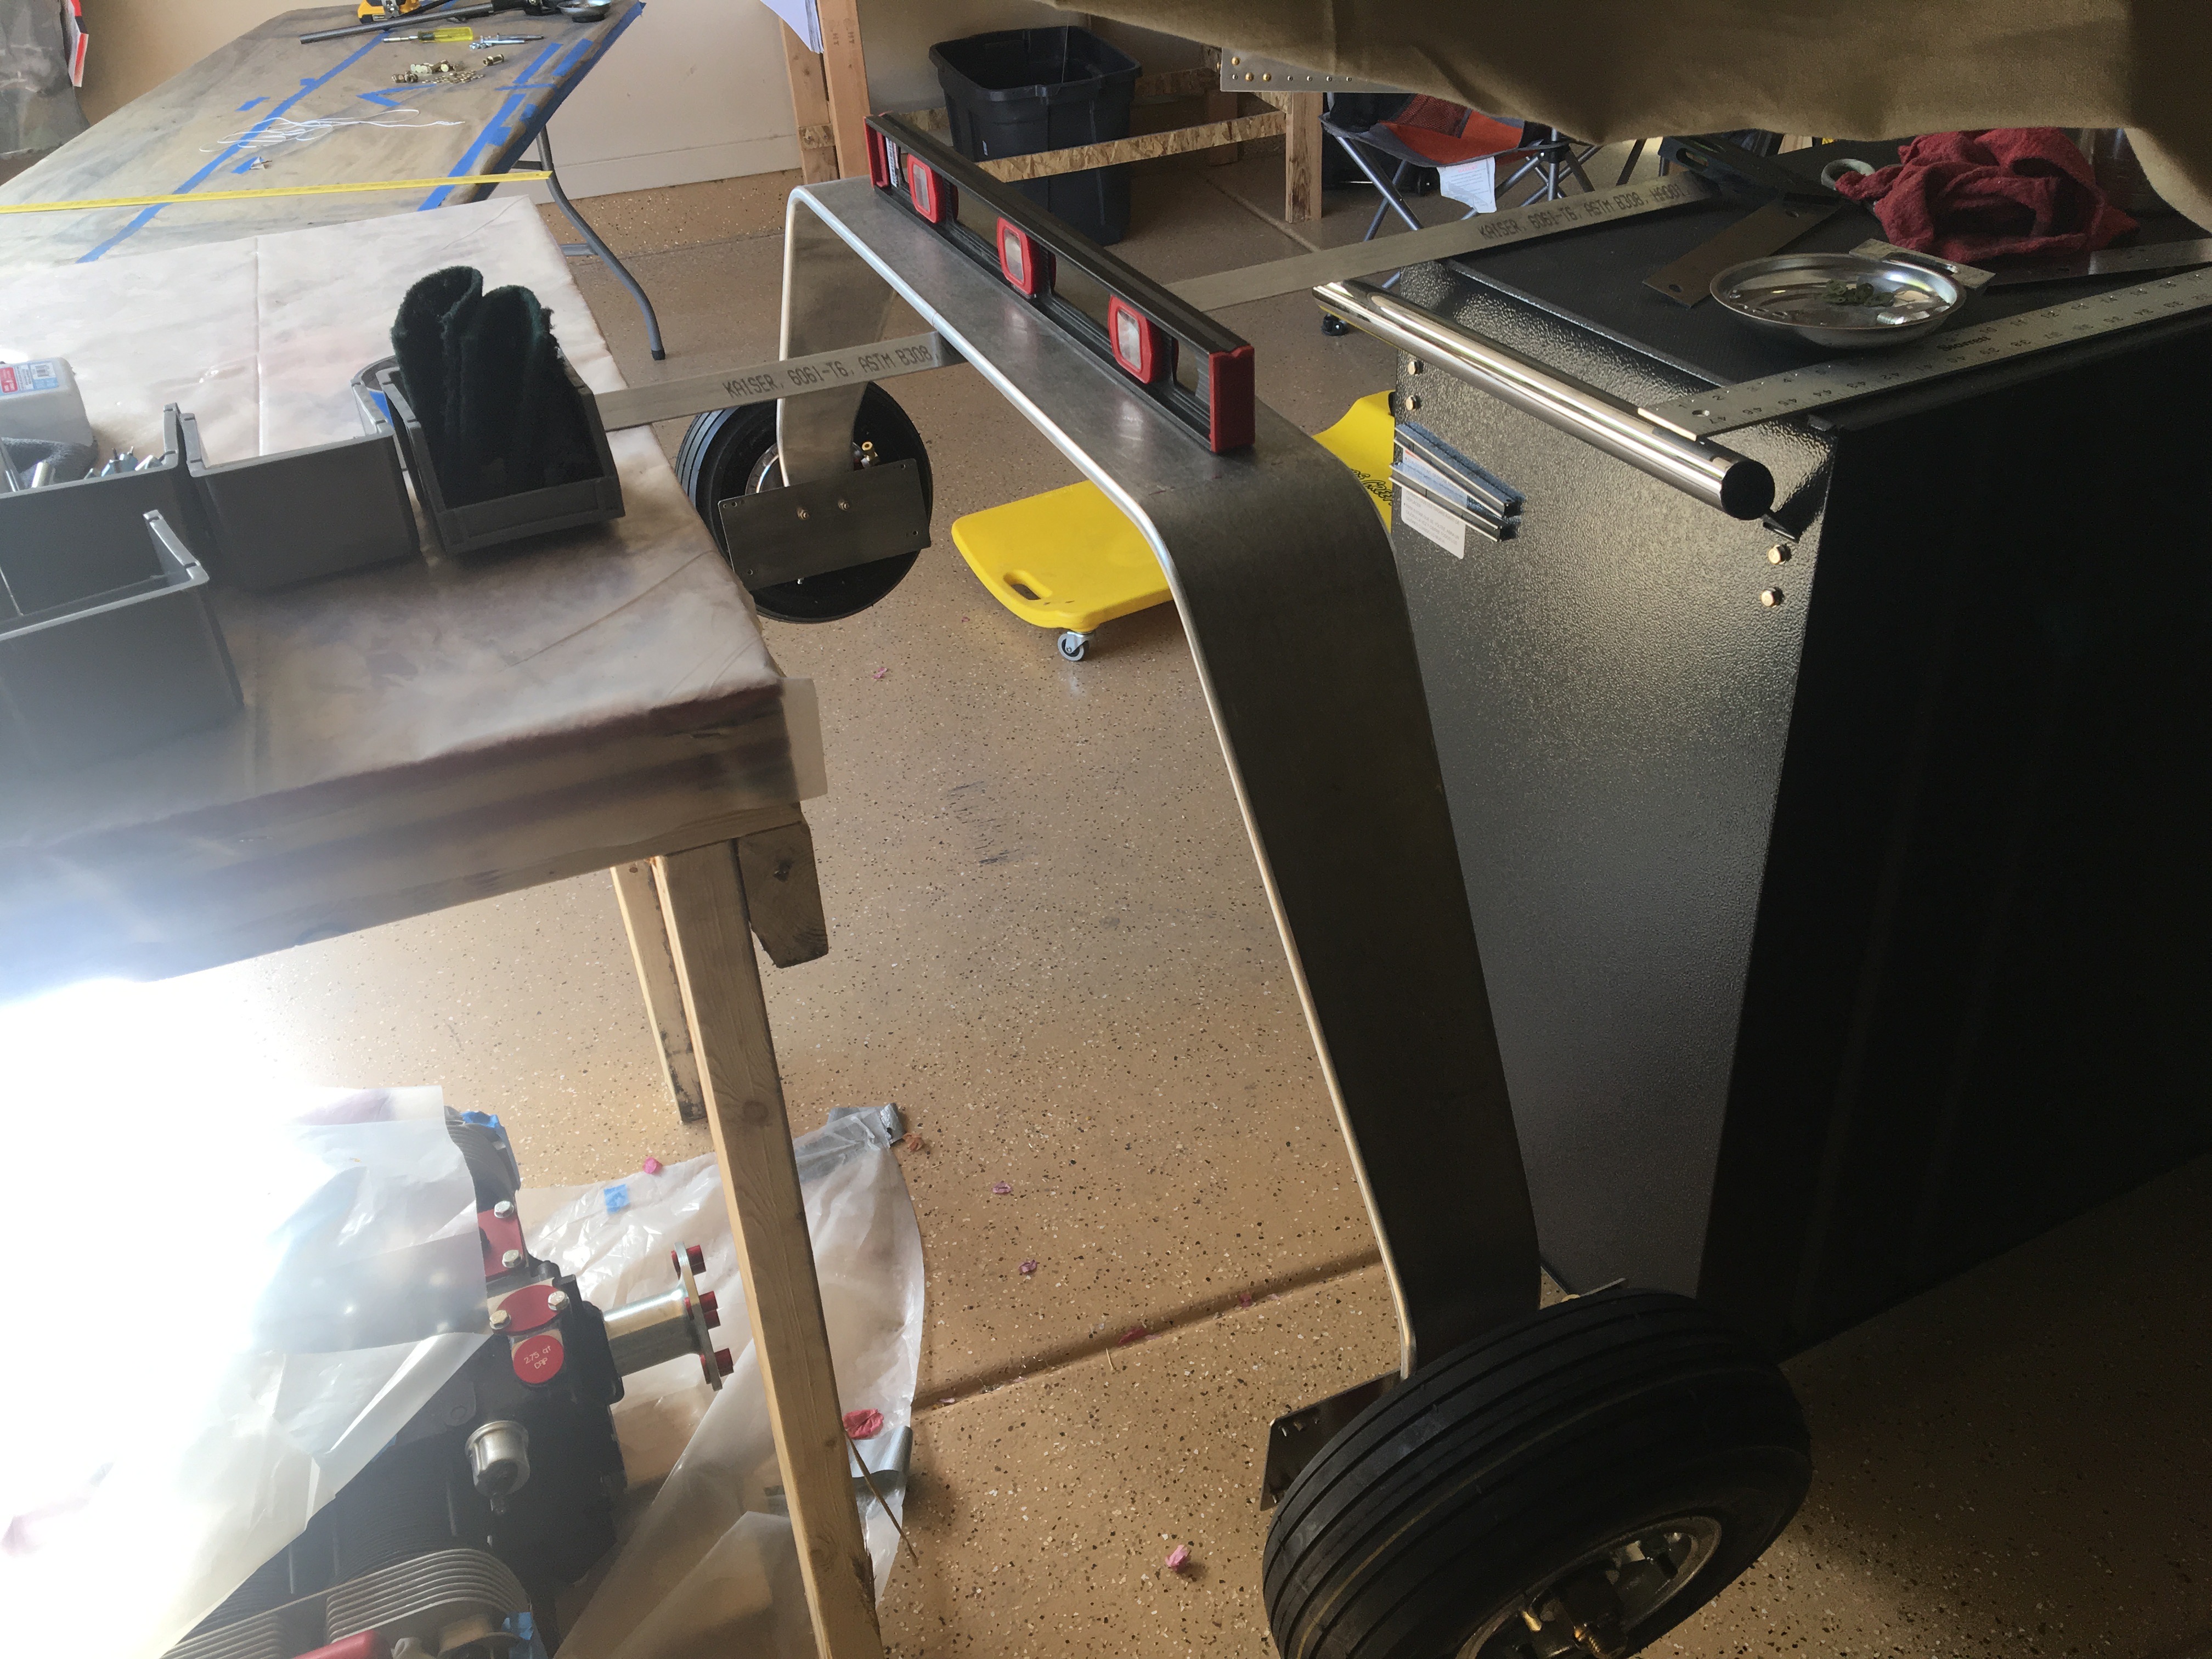
3) The second picture shows the strut balancing on the tip of aluminum angle. With use of a level to make sure it was pefectly balanced, and a carpenter’s square to make sure it was totally perpendicular, I had the center of gravity. Since all the brakes and tire parts on each end were identical, I now had the center of the strut. It matched the string’s measurement. Turns out technique #1 was not good at all.
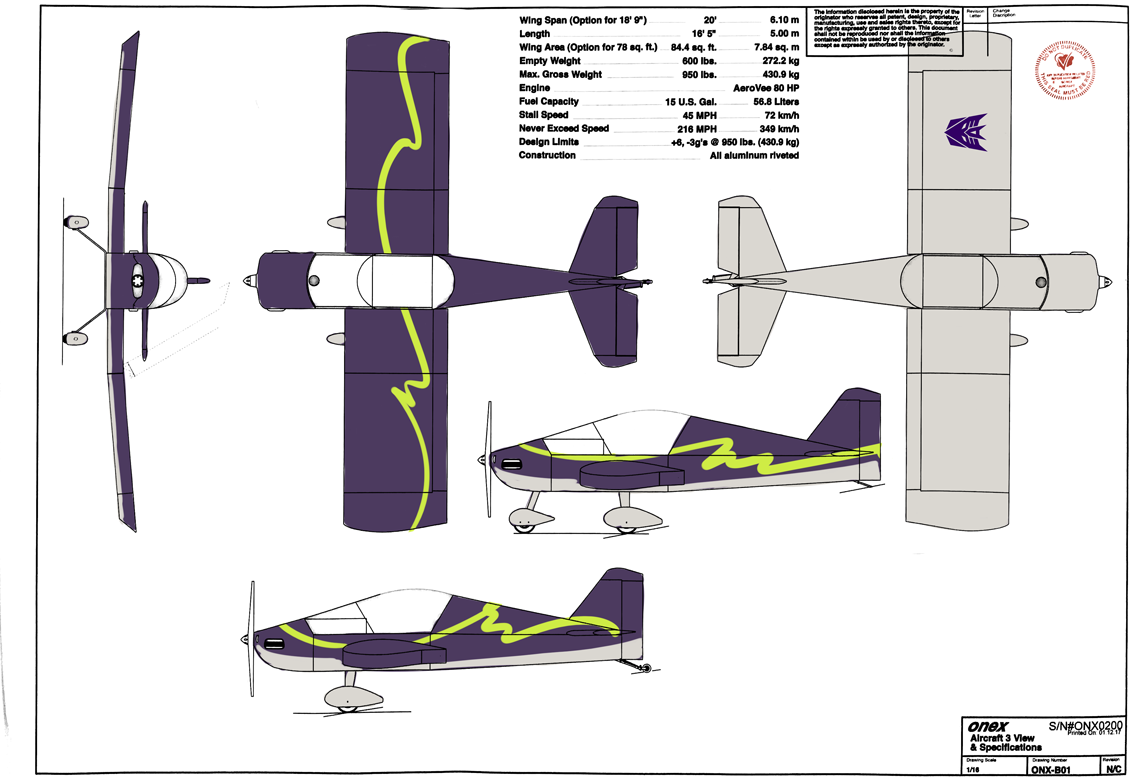
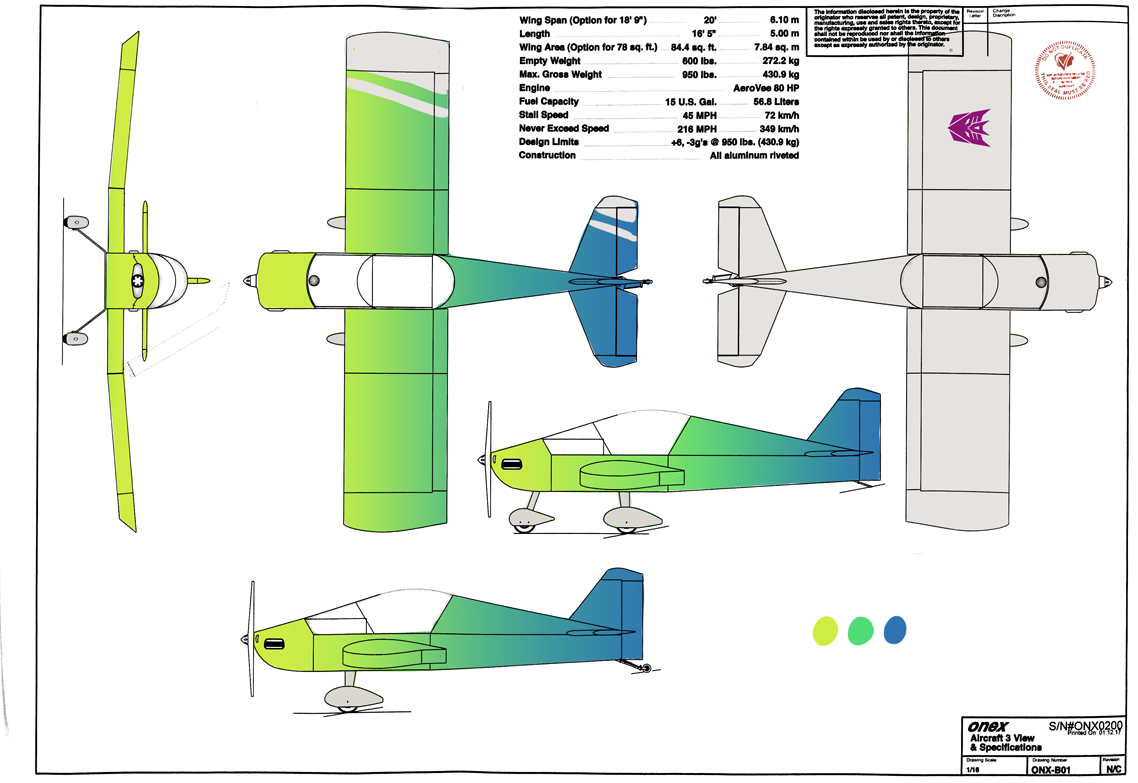
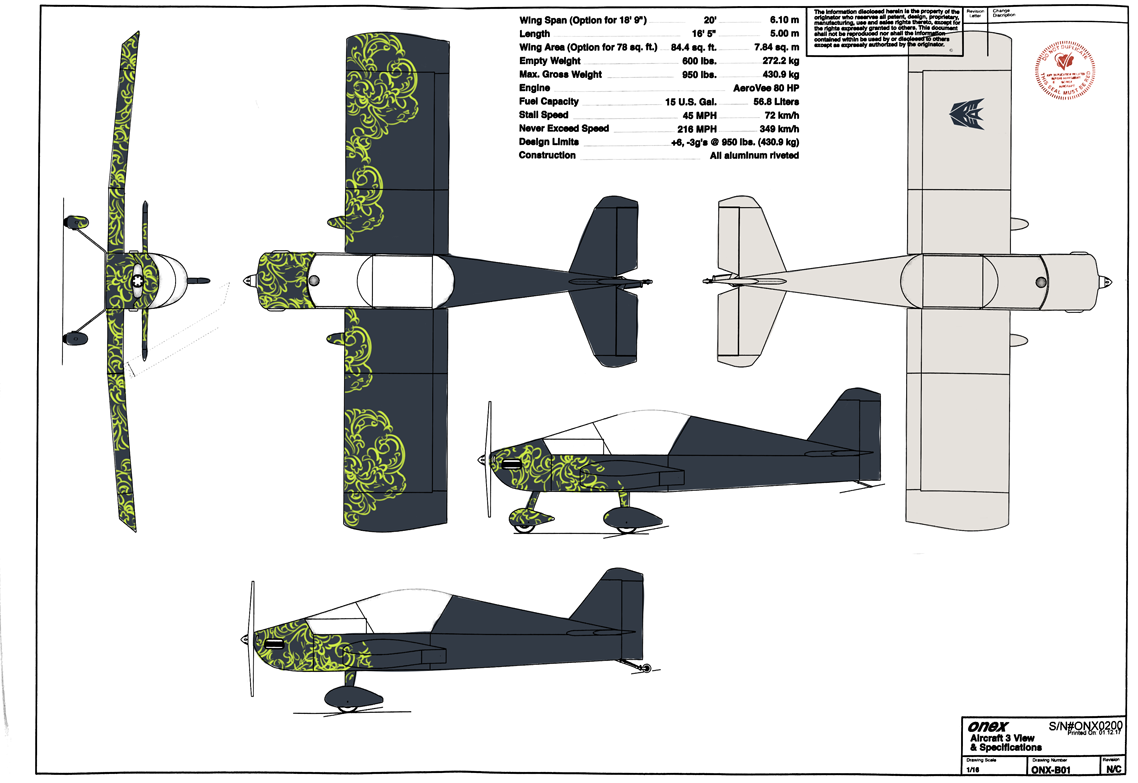
Designs
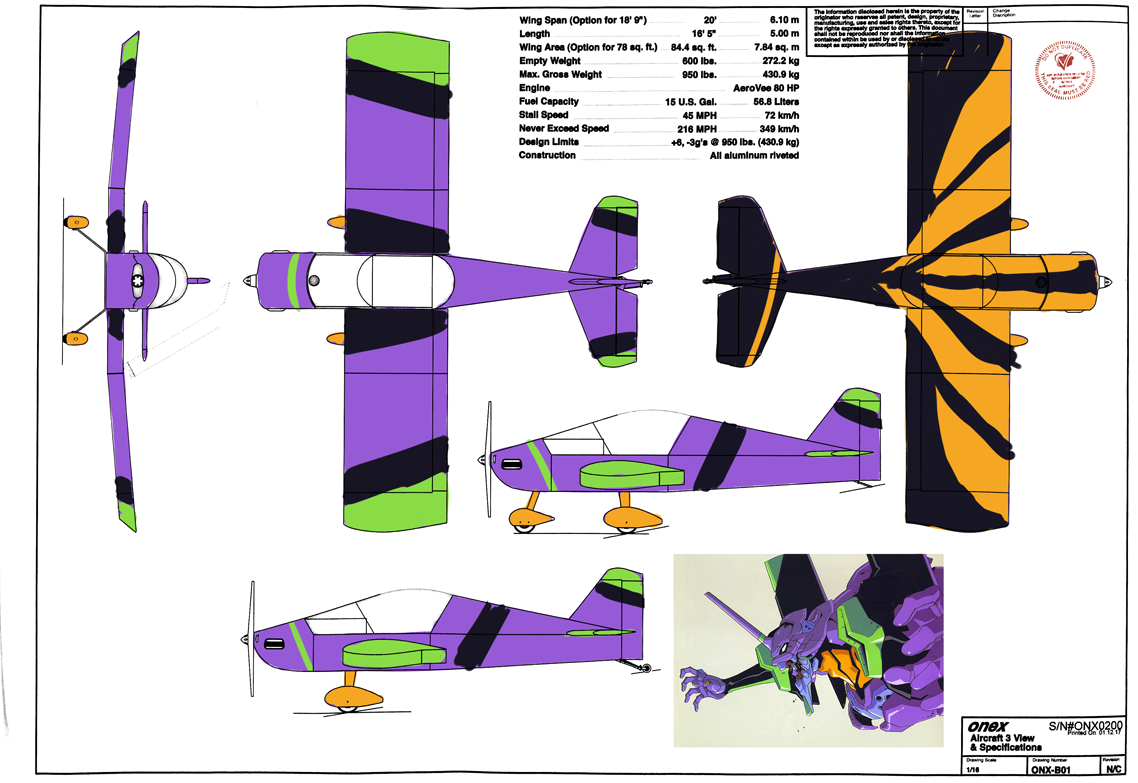
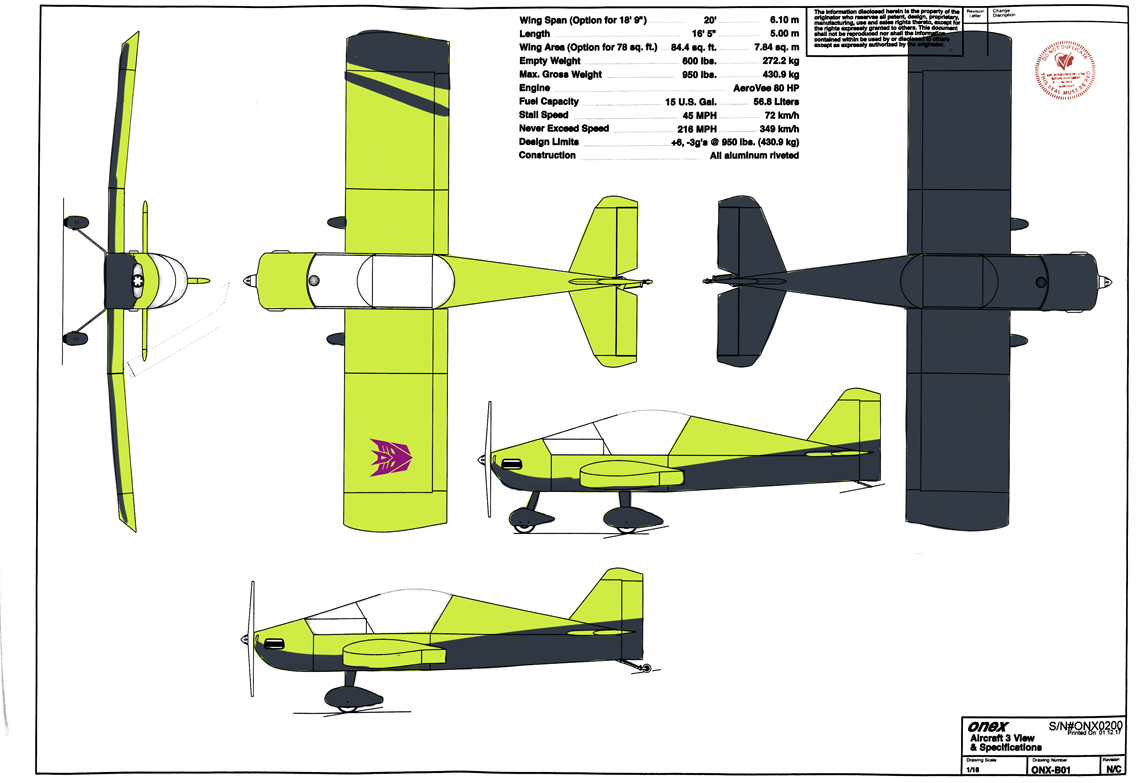
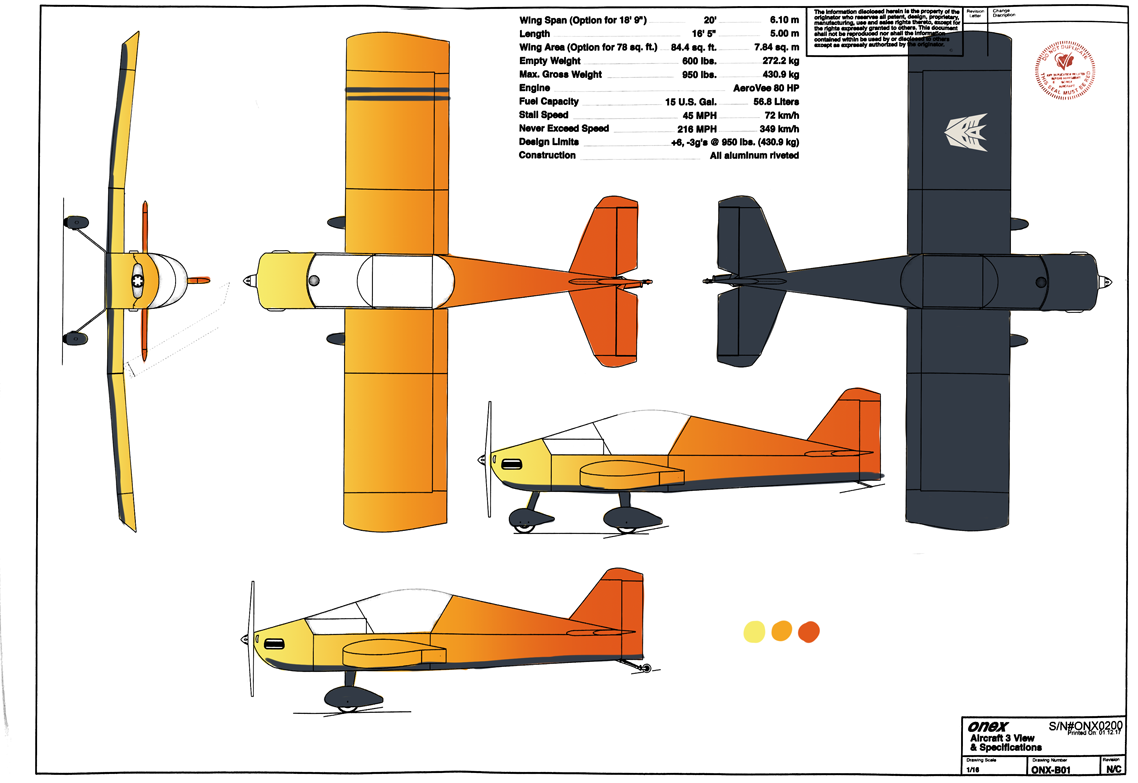
Checks out the design concepts my friend Nick Meccia did for me. I love how they make the plane come alive! I loved Transformers when I was a kid so I suggested a Decepticon theme. These make me giddy with reminiscent joy. Tough choice but my favorite is the second, Constructacon design.